
This article provides a detailed explanation on how to register and set up survey data.
By registering the survey data as the pre-construction topography (reference topography) and inputting the design data as the target design surface, it becomes possible to calculate the soil Volume.
In addition, by surveying and registering the topography as the construction progresses, the overall progress can be calculated.
-
Click the ”Add data layer”

-
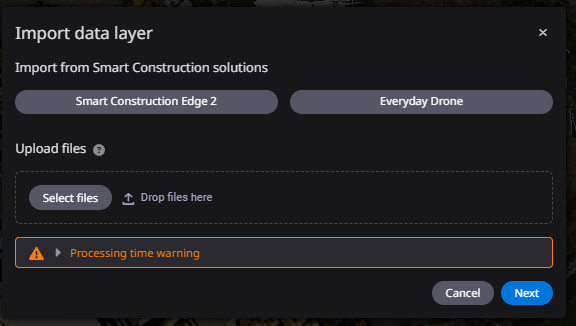
Upload survey data files by drag & drop or from a local folder and click "Next."
If two or more survey data files are registered, they can be automatically merged.
-
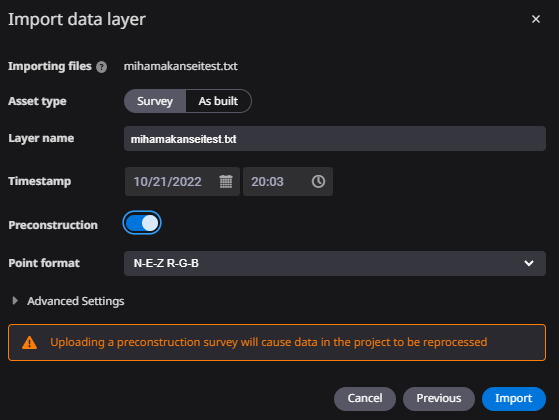
Register the survey data as preconstruction terrain or survey data.
a. Select "Survey" for the registration data type.
b. Turn ON "Preconstruction" to register as Preconstruction Terrain (reference terrain), and turn OFF "Preconstruction" to register as survey data.

*If the pre-construction terrain (reference terrain) has already been registered, the above items will not be displayed.
-
Set a timestamp (date and time of data registration) as the time of registration and click "Import".
Additional Notes:
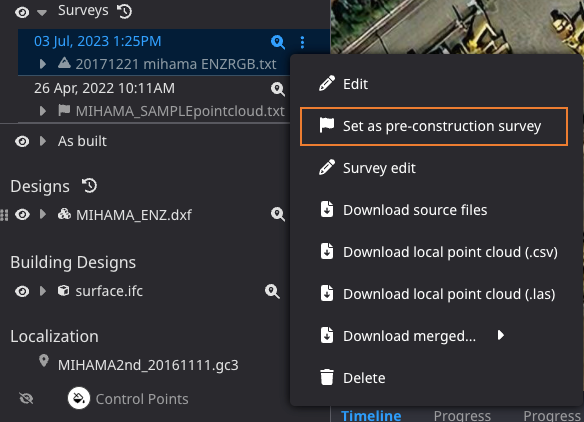
Preconstruction terrain (reference terrain) Flag
The flag icon is attached to the survey data registered as preconstruction terrain (reference terrain).
Re-set Preconstruction terrain:
The “register as pre-construction survey" option, shown in the orange box below, will appear in the Surveys data menu display. (*It will not be available for survey data that has already been registered as pre-construction survey.)
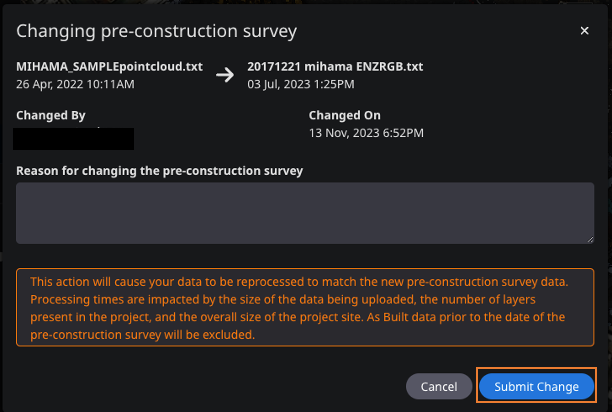
After making your selection, the following screen will appear. Please confirm the reason for the change and select the "Submit Change" button.
After selecting the "Submit Change" button, the re-tiling process will run.
Change the display style of survey data
You can change the display style of survey data.
Points: View point cloud only
Mesh: Generates a texture from the point cloud
Both: Displays both the point cloud and texture
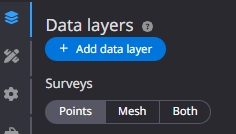
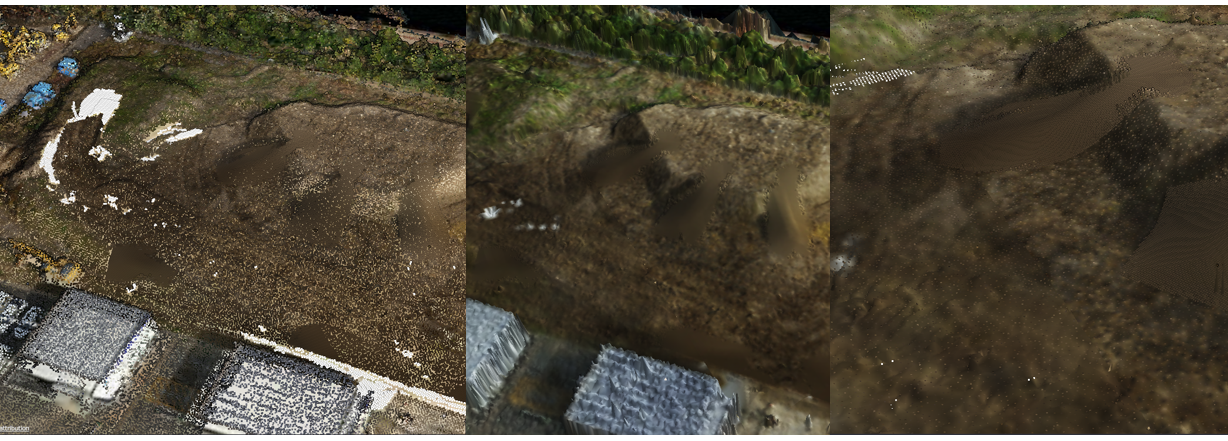
Points Mesh Both(points and mesh)