
The control point files (*.gc3) contain the control points (coordinates of N, E, and elevation) and localization data (coordinates of latitude, longitude, and elevation).
The control point files are necessary to 3DMC and usually are contained in the project files. You can read the control point files individually from USB memory or internal memory of the control box to 3DMC.
1. Press the ON/OFF button to turn the control box on and wait for it to power up.
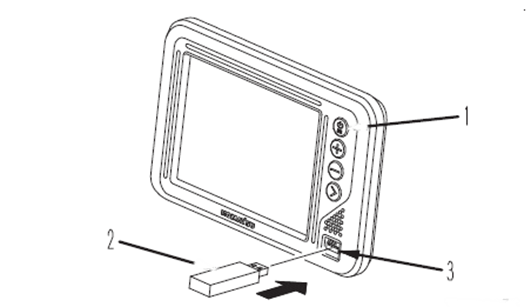
2. Insert USB stick (in which control point files are saved) into USB port of the control box.

3. Press the power ON/OFF button again to switch to the main menu.
4. Press the “File” menu, then press “Control...”.
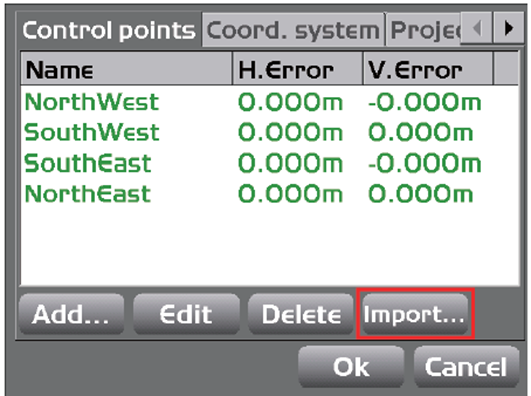
5. On the “Control points” tab, press “Import...”.
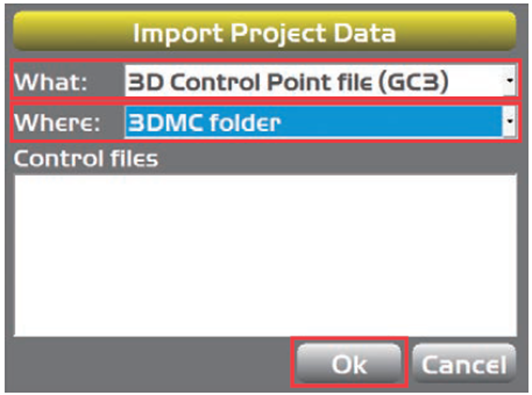
6. On “Import Project Data” screen, select “What:” and “Where:”.
-
As “What:”, select the “Control point files (GC3)” or “Control data from project file (TP3)”.
-
As “Where:”, select the place where the control point file is saved.
7. Select the name of the file to be imported, and press “Ok”.
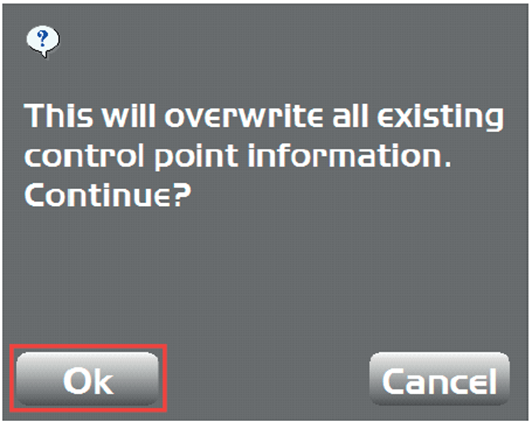
The message screen is displayed.
8. Press “Ok”, to apply the data to the current work.
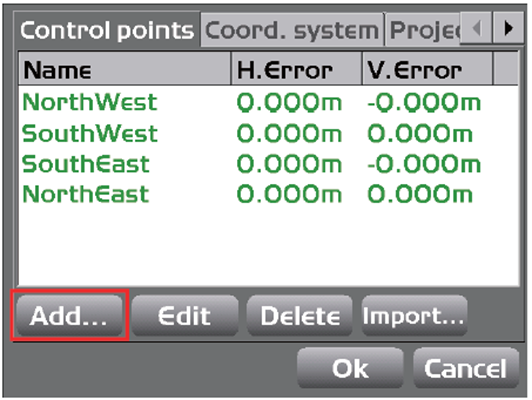
9. When adding a new control point, press “Add...” on “Control points” tab.
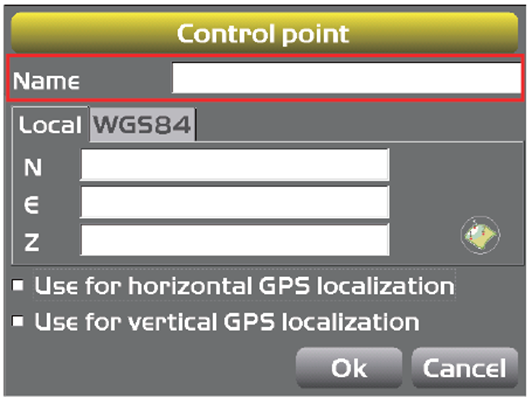
10. On “Control point” screen, press the blank field for “Name” and the keyboard will appear.
11. Type the name of the new control point, by using the onscreen keyboard.
12. Input the information of the control point.
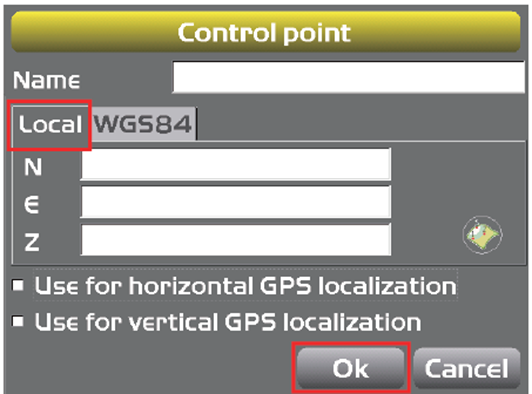
“Local” tab
-
Input “N” (Northing), “E” (Easting), and “Z” (elevation).
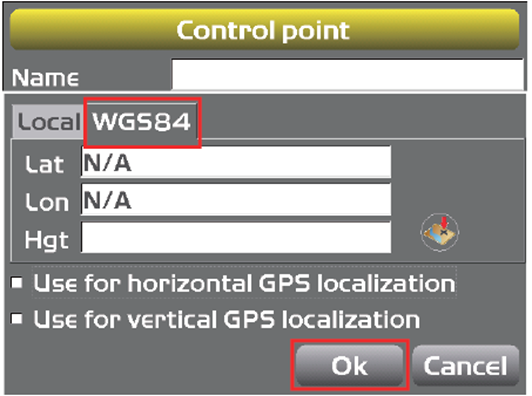
“WGS84” tab
-
If correct GNSS coordinates are available, input the “Lat” (Latitude), “Lon” (Longitude), and “Hgt” (Ellipsoid).
Check box of localisation
-
Check this when using for localization
13. Press “Ok”.
Returns the screen to the previous screen.
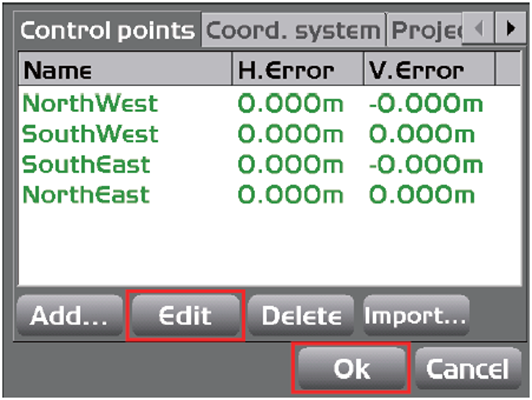
14. When editing a control point, select the control point to be edited on the “Control points” tab, then press “Edit”.
15. Input the new jobsite coordinates or GNSS coordinates, and press “Ok”.
Returns the screen to the screen shown in the right figure.
16. Press “Ok”.
The screen returns to the main window.