On this Page:
Geofences
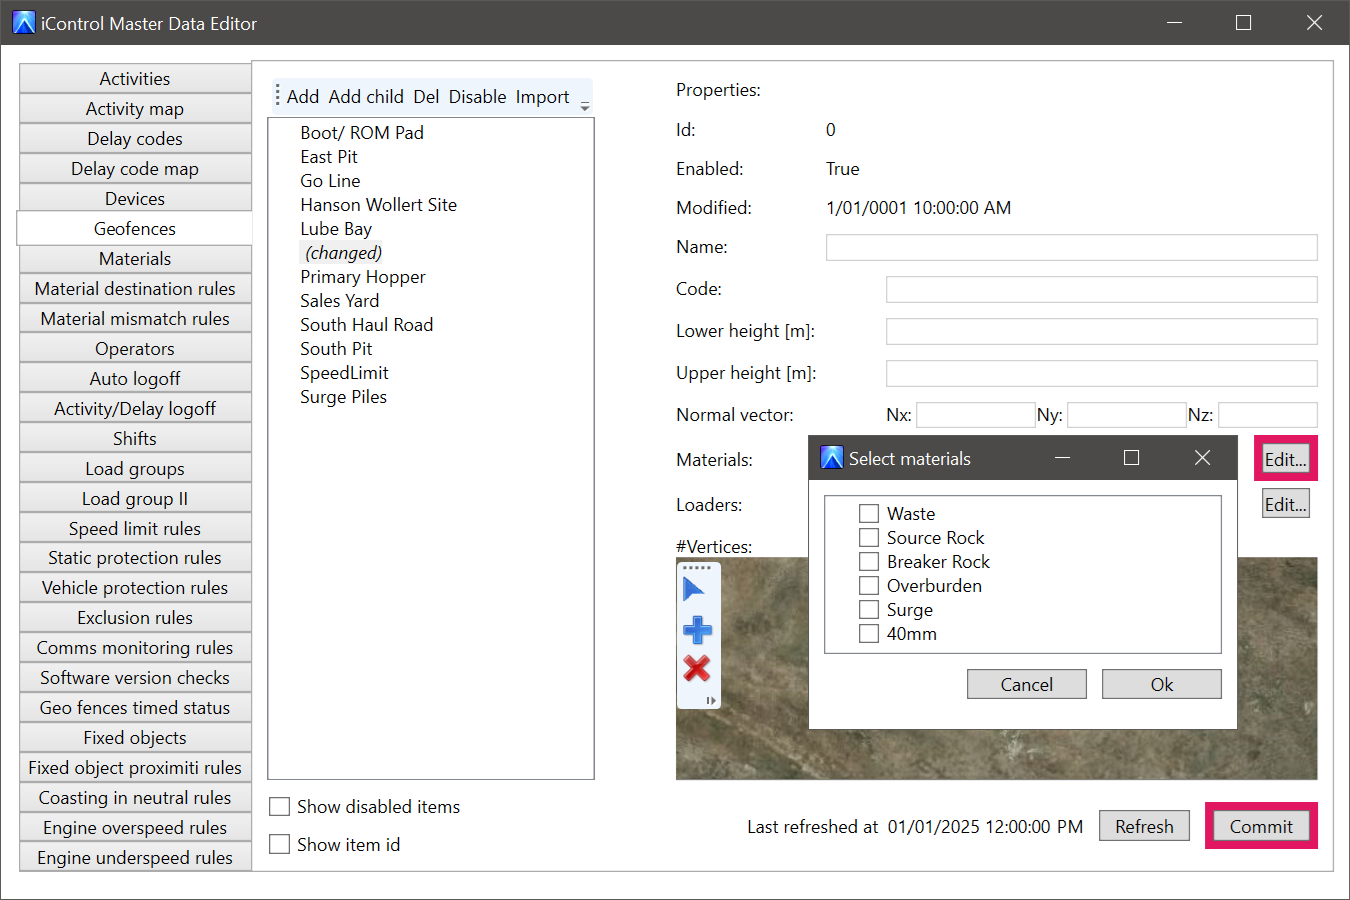
Geofences are managed in the Geofences tab of the Master Data Editor in iControl.
Geofence configuration settings
|
Field |
About |
|---|---|
|
ID |
An unique number to identify the geofence. This is system generated and cannot be altered. |
|
Enabled |
A boolean value (yes or no) that defines whether the geofence is enabled or disabled. |
|
Modified |
A time stamp for the last time this geofence was edited. |
|
Name |
The name given to the geofence. This can be a mix of characters and numerals. |
|
Code |
A field made available for integration with third-party systems. Anything entered here is stored in the database alongside this geofence. |
|
Lower height |
Specifies the lower altitude boundary of the geofence; if both a lower and upper height is supplied the geofence becomes 3D. |
|
Upper height |
Specifies the upper altitude boundary of the geofence; if both a lower and upper height is supplied the geofence becomes 3D. |
|
Normal vector |
Advanced users only. Used to rotate a geofence in 3D space. The rotation is applied at the first vertex of the geofence. |
|
Materials |
The name of the material assigned to this geofence. Any trucks loaded inside this geofence that do not receive a material from their loaders have their Material field automatically populated in the Iris database with this material upon load cycle completion. |
|
Loaders |
The name of the excavator or loader assigned to this geofence. Any trucks that load inside this geofence and do not pair with another iVolve loader have their Loader field automatically populated in the Iris database with this loader upon load cycle completion. |
Adding Geofences by drawing on the map
You can manually add geofences in iControl by drawing directly onto an aerial site map.
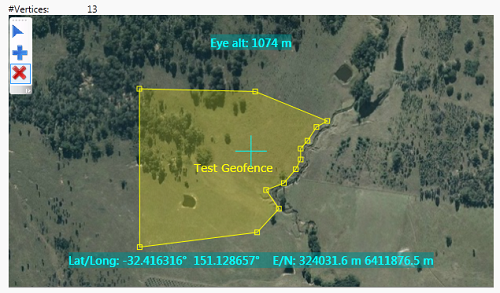
The following three tools are available to define new geofences.
These tools are only available when you add new geofences.
|
Button |
Name |
Function |
|---|---|---|
|
|
Select or Move |
Select this tool to pan around the map, or to select geofence vertices and drag them to new locations. |
|
|
Add Vertex |
Select this tool to add a new vertex wherever you click the map. The vertex is added after the last vertex that was added. |
|
|
Delete Vertex |
Select this tool then click an existing vertex to remove it from the geofence. |
Manually add geofence
To manually add a new geofence:
-
Click Add to create a new geofence, or select an existing geofence and click Add Child to create a child geofence to the existing geofence.
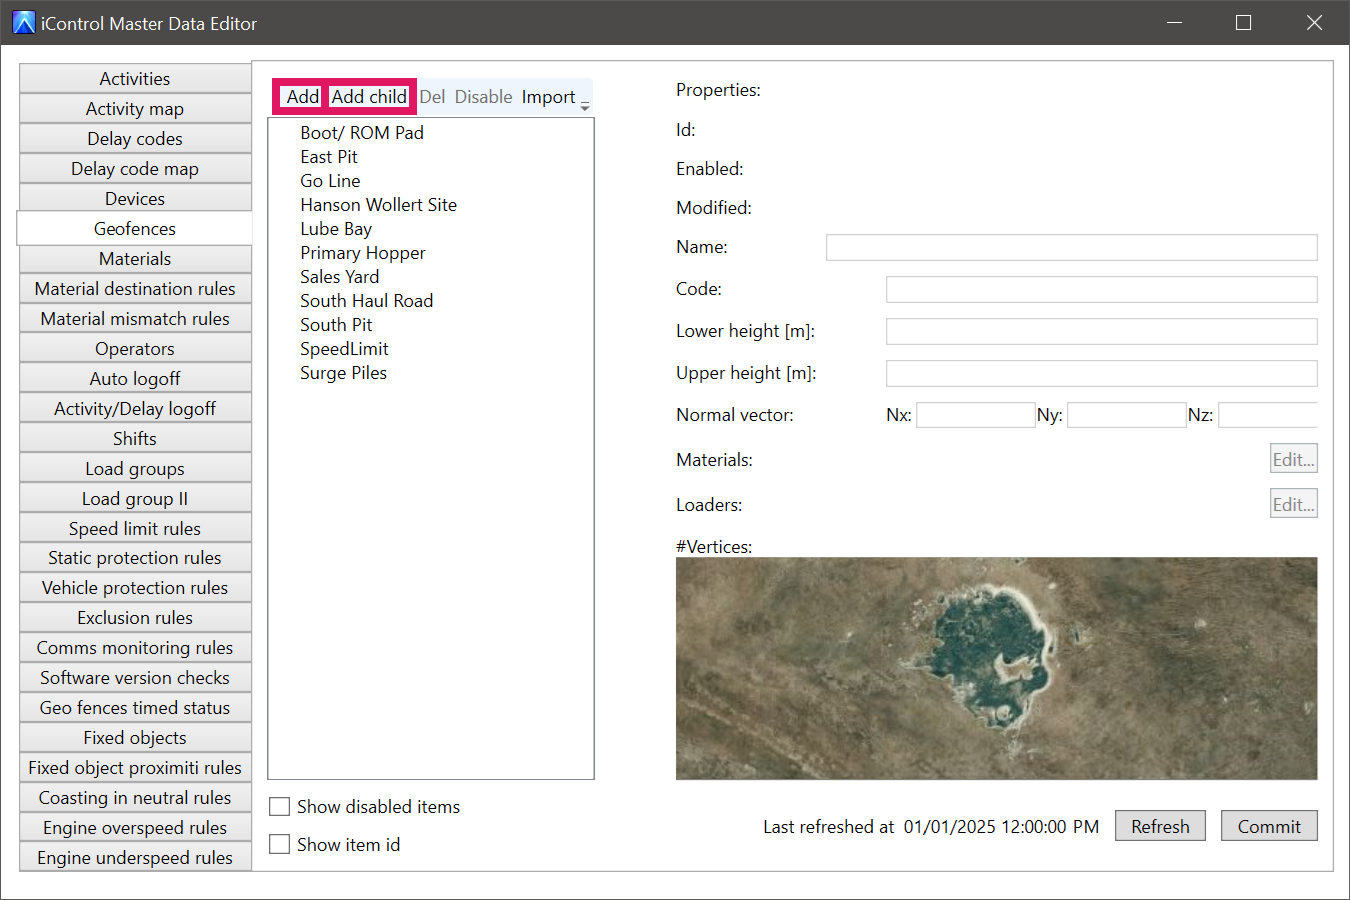
-
Enter a Name. If this is a new geofence, the name must be unique among the other geofences. If this is a child geofence, the name must be unique among the other child geofences.
-
Enter a Code as needed. This field is only used for integration with third-party systems, and as such is not required for iVolve setup. Any data you enter here is stored in the database with this record.
-
Enter a Lower height and Upper height as needed to restrict a geofence to a specific altitude or range. Geofences can be drawn in 3D geofences, and heights are defined in metres above or below the WGS 84 ellipsoid. This field is not mandatory, and can be left blank to define a 2D geofence instead.
-
To assign Materials and/or Loaders, click the Edit button in these fields, select check boxes as needed, then click OK.
Assigning a Material to a geofence will change the geofence's colour as it is displayed in iControl. These colours come from a pre-defined colour palette in iControl.
-
Draw the vertices on the map using the Add and Delete vertex buttons discussed above; iVolve recommends limiting geofences to a maximum of 100 vertices.
-
After the geofence is drawn, use the Normal vector field as needed to rotate a geofence in 3D space along the X, Y, and Z axes. The rotation is applied at the first vertex of the geofence.
-
Click Commit to add the geofence, or click Refresh to clear its details.
If you click Refresh, any unsaved changes will be lost. You cannot undo this, and will need to re-enter and redraw any geofence data that is lost.
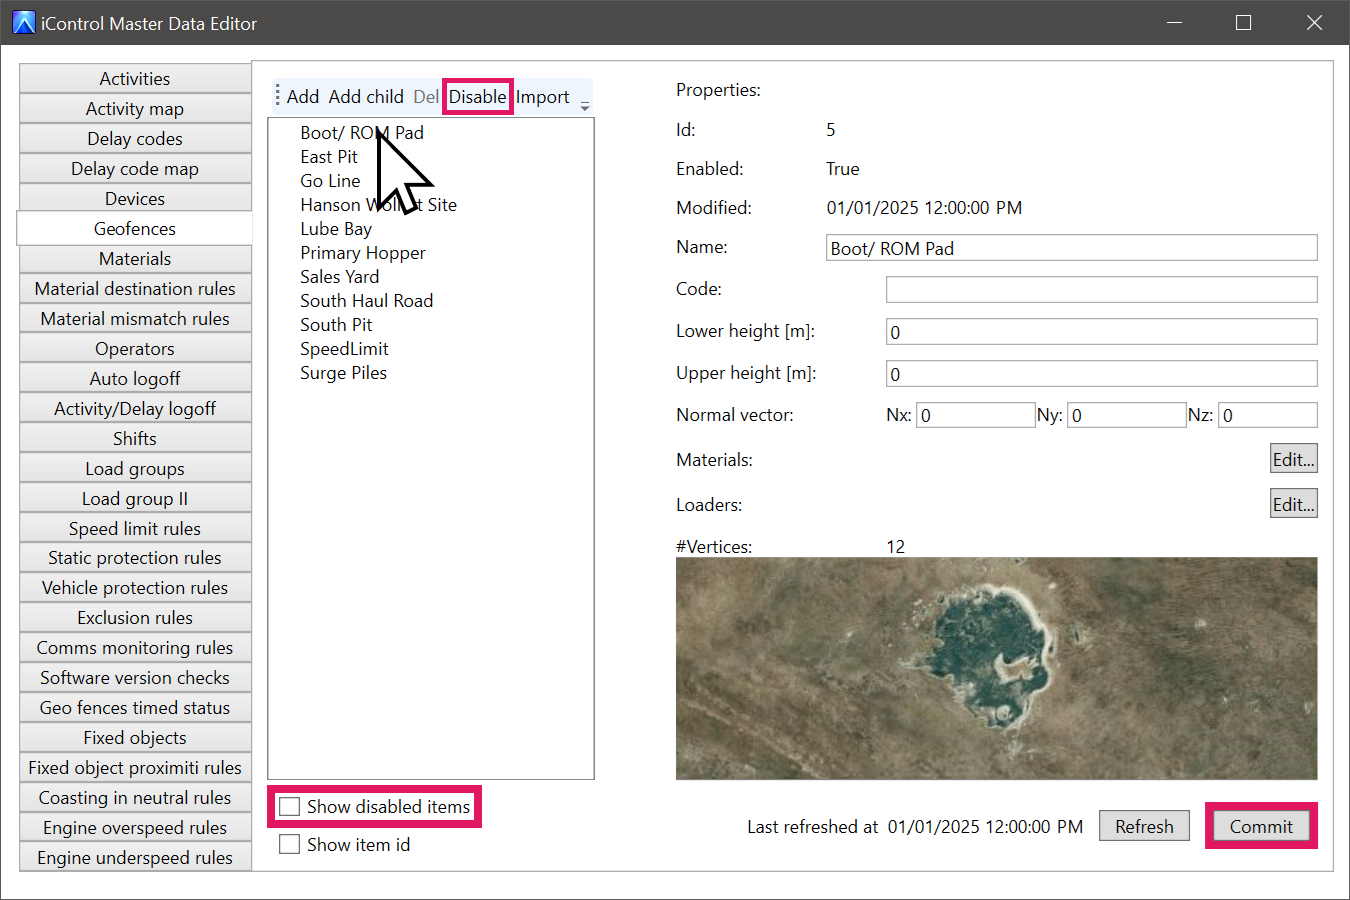
Editing and disabling/enabling geofences
Excluding the unique ID and vertices, all fields of an existing geofence entry can be modified.
Editing the vertices of existing geofences is disabled by design.
You can also disable geofences so that they are no longer applied to your site.
To edit an existing geofence:
-
Select an existing geofence and make changes as needed.
-
Click Commit to save your changes, or Refresh to discard them.
If you click Refresh, any unsaved changes will be lost. You cannot undo this, and will need to re-enter and redraw any geofence data that is lost.
Alternatively, to disable an existing geofence, select it from the list, then click Disable. You can also enable a disabled geofence by selecting the Show disabled items check box, selecting a disabled geofence, then clicking Enable.