
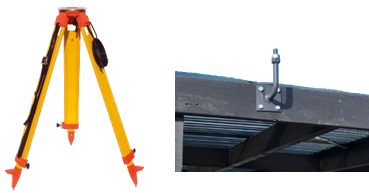
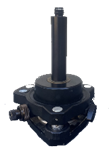
Install EdgeBox on the tripod or permanent rigid 5/8 pole
-
Prepare tripod with 5/8 in. screw on the top. Top of the tripod must be flat.
-
Use a Tribrach if needed to position over the control mark.
Create a project
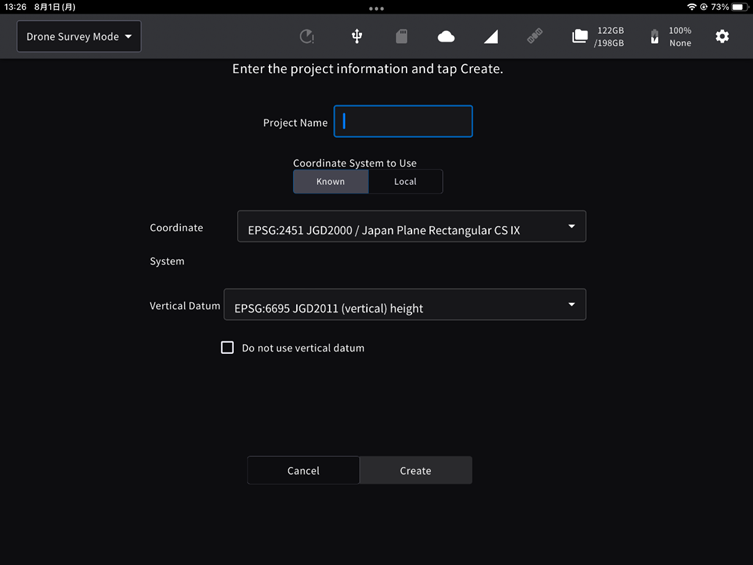
(a) Create in a public coordinate system (using ESPG code)
Use https://epsg.org/search/map to search EPSG codes.
-
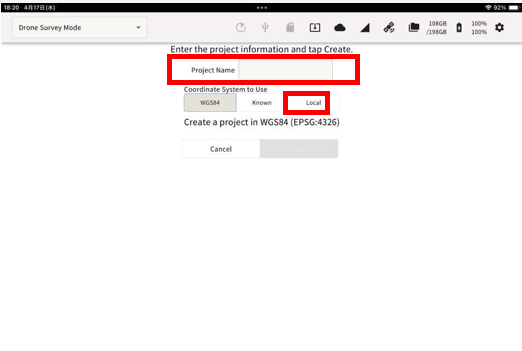
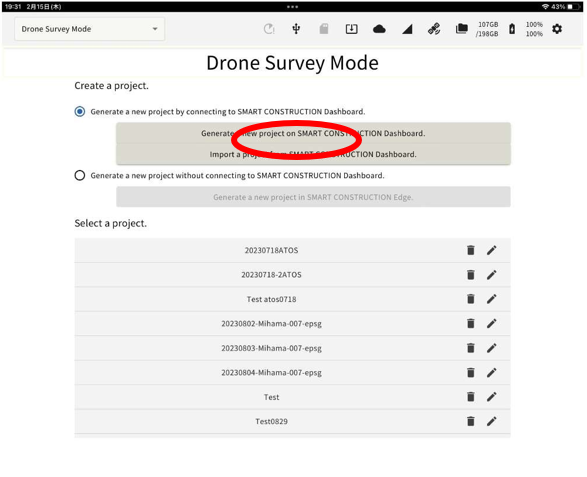
Tap “Create a new project”

Make sure “Known” is selected in “Coordinate system to use” and enter the ESPG code & Vertical Datum.
For Example: For MGA2020 Zone56 Ausgeoid 2020 you will choose EPSG = 7856 GDA2020 / MGA zone 56 & 5711 AHD height
-
If you enter a part of EPSG code, then it will show the candidates. (You can also type the name)
-
Choose the asocaited Vertical Dartum (Gepid) to use.
-
Tap “Create”.
(b) Create in local coordinate system (using localisation file)
If you have a localisation file from a rover, you can also create a project using the localization file. Localization file should be in CSV format and saved in the root directly of the USB memory.
-
Insert the USB memory into the USB slot (inside the waterproof lid) of the EdgeBox

① Status LED
① SD card slot
② Ether cable port
③ USB slot(USB3.0)
④ SIM card slot
⑤ Water-proof USB slot(USB2.0): cannot use this slot for USB memory
-
Tap “Create a new project”
-
Name the Project
-
Select “Local” in the project coordinate system.
-
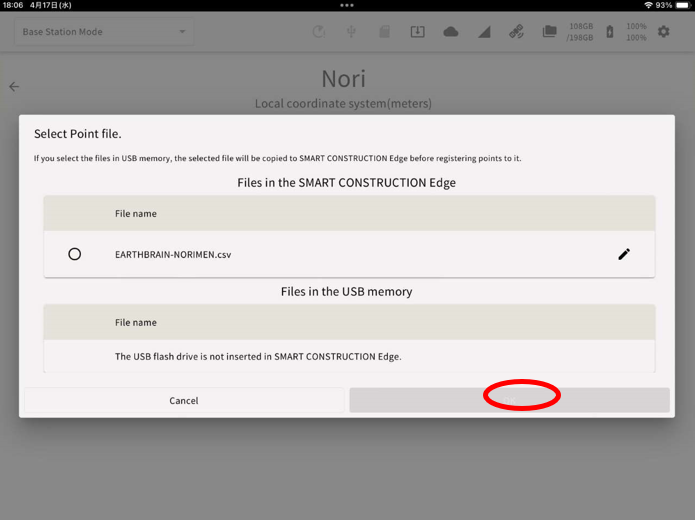
Tap “Import Localisation File” to specify the file for localisation.
-
Files are saved once loaded to the edge and files can be selected from USB or from within the Edge's memory.
-
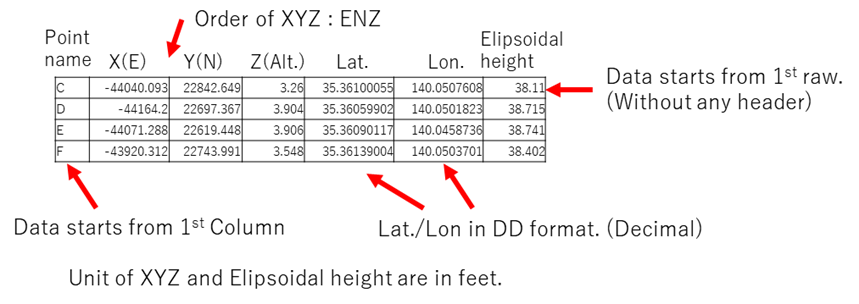
Please prepare the localization file in advance. Set the file format parameter according to the file and tap “OK”.
Pay attention to WGS Lat./Lon. Format DD for Decimal Degrees & DMS for Degrees Minutes Seconds.
Example of the format above
-
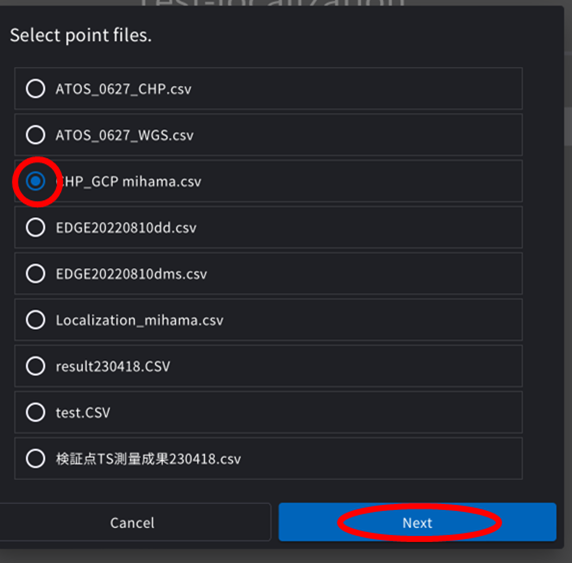
Select the file and tap “Next”.
-
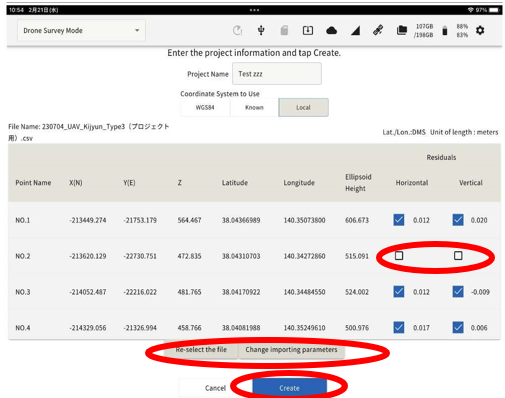
The contents of the imported localization file are displayed on the screen.
Confirm the values are correct and aligned correctly, then tap “Create”. -
You can choose to use or not use horizontal and vertical localization at any point.
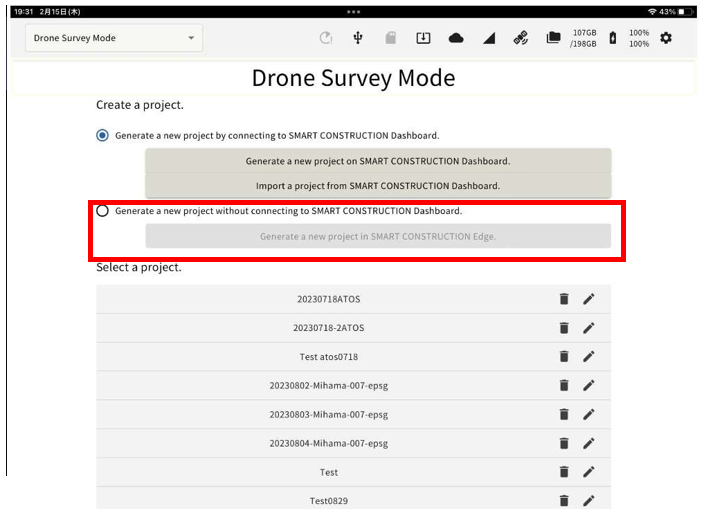
CREATE A NEW PROJECT BY CONNECTING TO SMART CONSTRUCTION
-
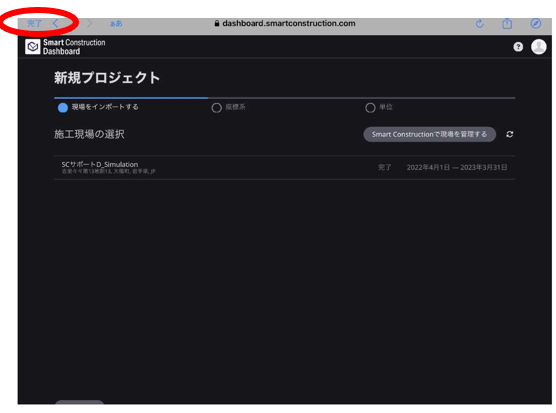
Generate a new project by connecting to SMART CONSTRUCTION Dashboard) Tap to go to the Dashboard screen and can create new site it from the EDGE2 app.
After creating the site, tap the completion icon in the upper left.
*Localization files for GC3 and TP3 should be placed directly under the Tablet folder.
-
(Import a project from SMART CONSTRUCTION Dashboard)
If you tap and are logged in to your account, the Dashboard site will be displayed.
By tapping any site and pressing OK, you can create a project using the same coordinate code as Dashboard.
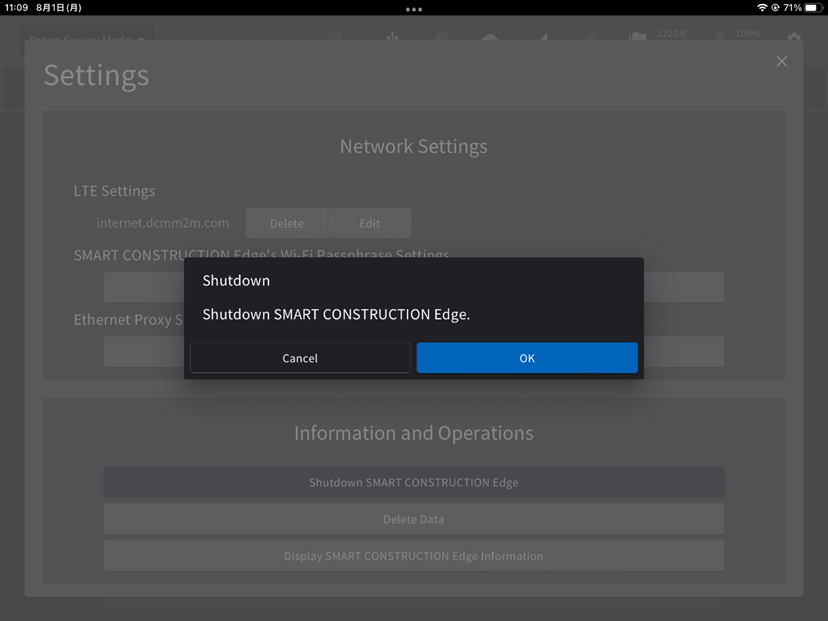
Power off Edge2
Always follow this procedure when shutting down Edge2. Follow this procedure to turn off EdgeBox before removing the battery or AC adapter. As it may cause a short circuit and resulting an ignition or an electrical shock.
-
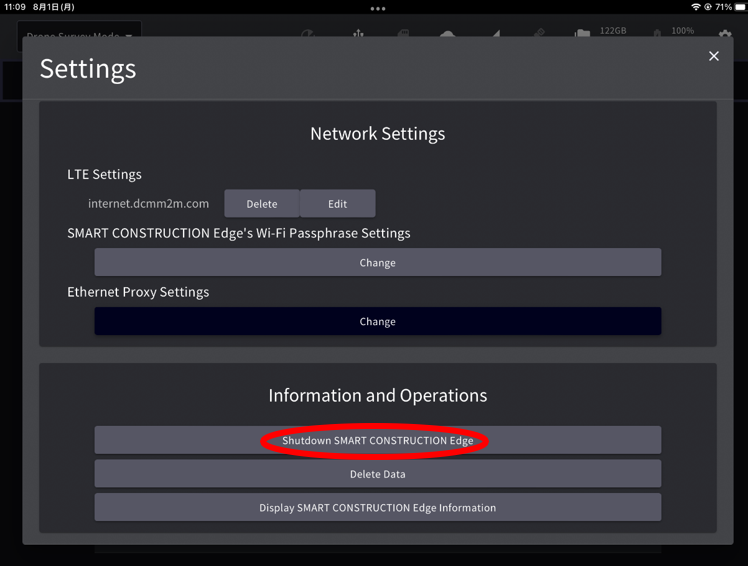
Tap Settings icon

-
Scroll down to tap “Shut Down SMART CONSTRUCTION Edge” in “Information and Operations” section of the Settings screen.
-
You can also turn off the power by pressing and holding the power button on the main body for about 4 seconds.
The Status LED on the main body will flash green during the termination process. The Status LED will go off when the exit process is complete.
Shutting off EdgeBox while doing the following can lead to data corruption or system unavailability. Please turn off the power AFTER these processes are completed.
・Point cloud creation
・ PPK logging
・ Data Transmission
・ Exporting data