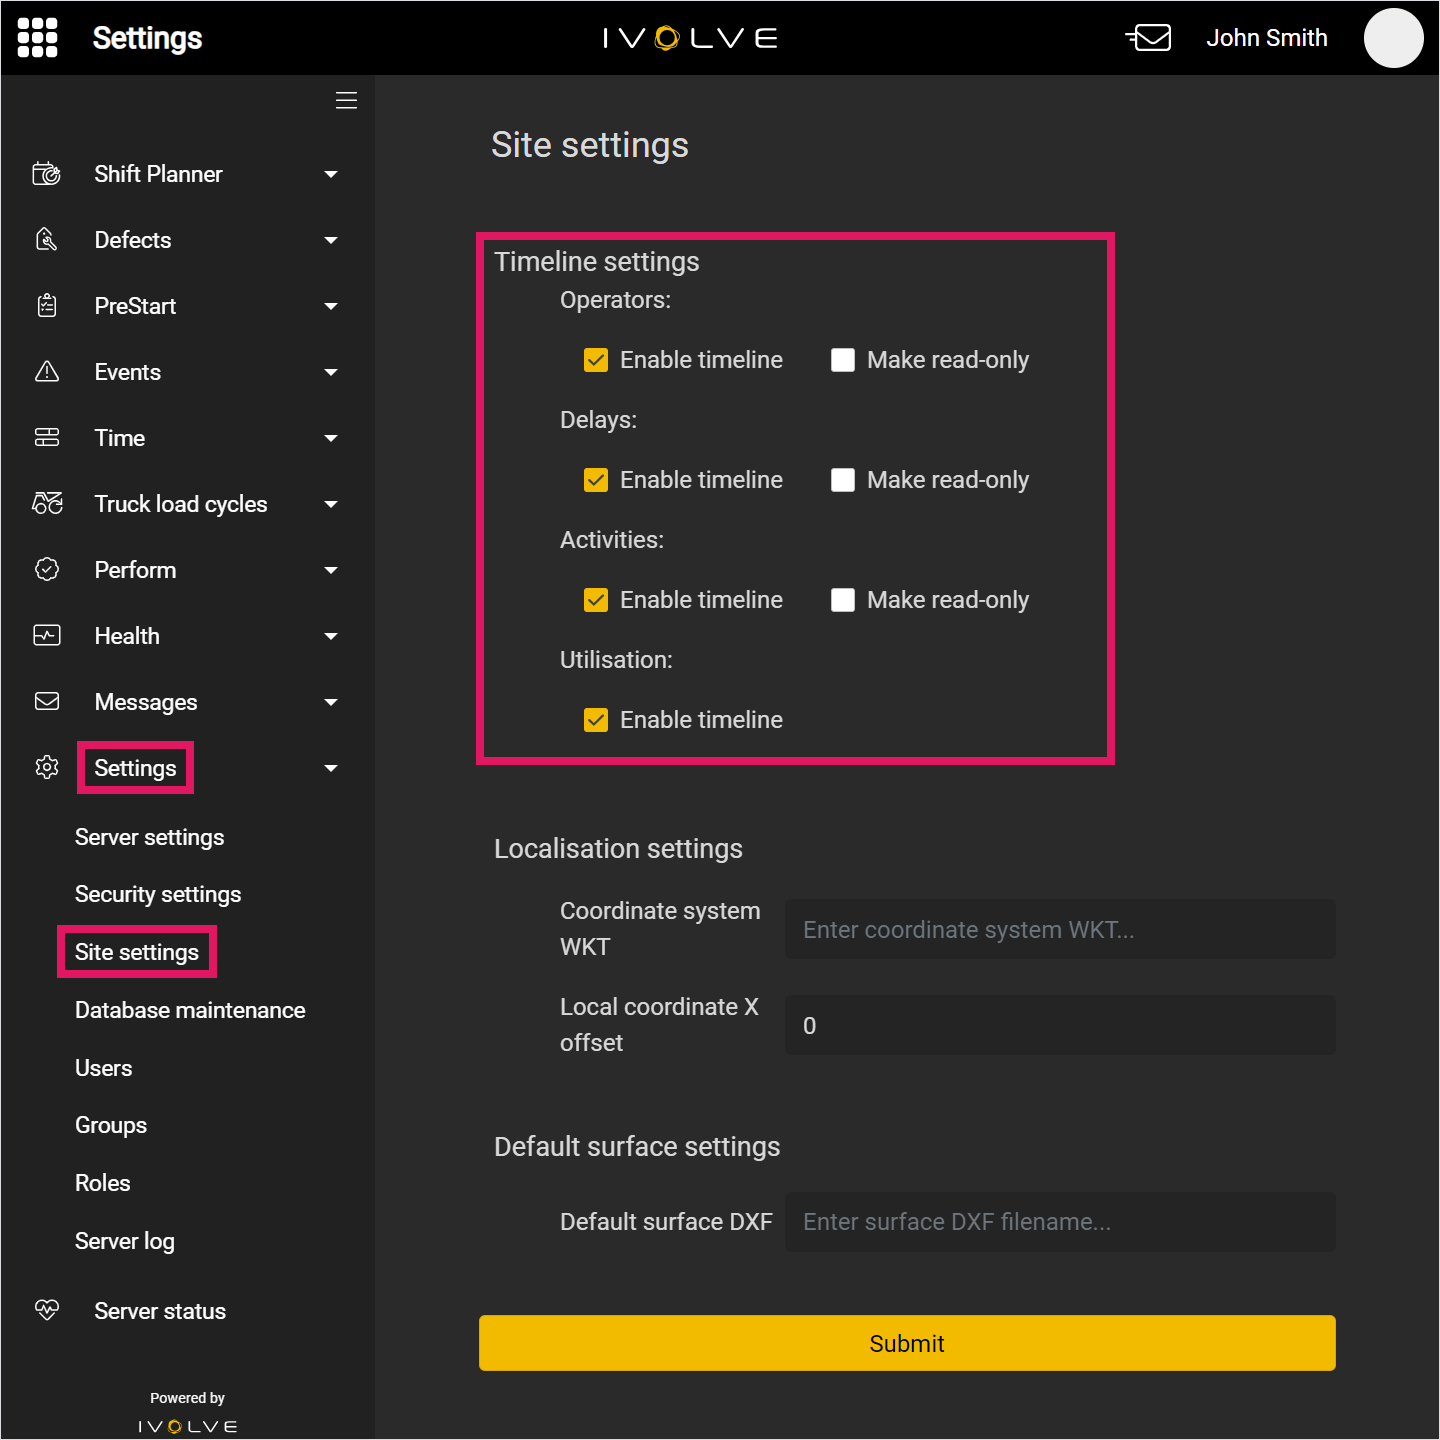
Administrators can configure user access to the overall Timeline editor, such as disabling the Activities or Delays rows to remove them from the timeline display, or making certain aspects read only.
Unlike the Configuring the timeline section above, the changes made here apply to all users. If you remove a row from the Timeline editor here, no user will be able to view or edit this row until it is reinstated. The following process should only be completed by administrators within your organisation.
Removing a row (such as Activities or Delays) does not delete its data, or change how data is recorded. The data recorded by iVolve is not affected by what sections are configured here.
To configure Timeline editor access:
-
In GoLine, select Site settings in the Settings section of the left-hand menu.
Depending on your level of access, this section might not be available. View the Managing user permissions with groups and roles in Iris article for more information, or contact your site administrator.
-
Scroll to the Timeline settings section, then select or clear check boxes as needed.
Select the Enable timeline check box to display that section on the timeline, and select the Make read-only check box to make that section read-only.
For example, if you select the Enable timeline check box for Delays, then the Delays row will be available for all users who can access the Timeline editor. If you clear this check box, the Delays row will not display for any users on the Timeline editor.
Further, if you select the Make read-only check box, the Delays row will be available to view, but users will not be able to add or edit any entries on this row.
-
Click the Submit button to save your changes.
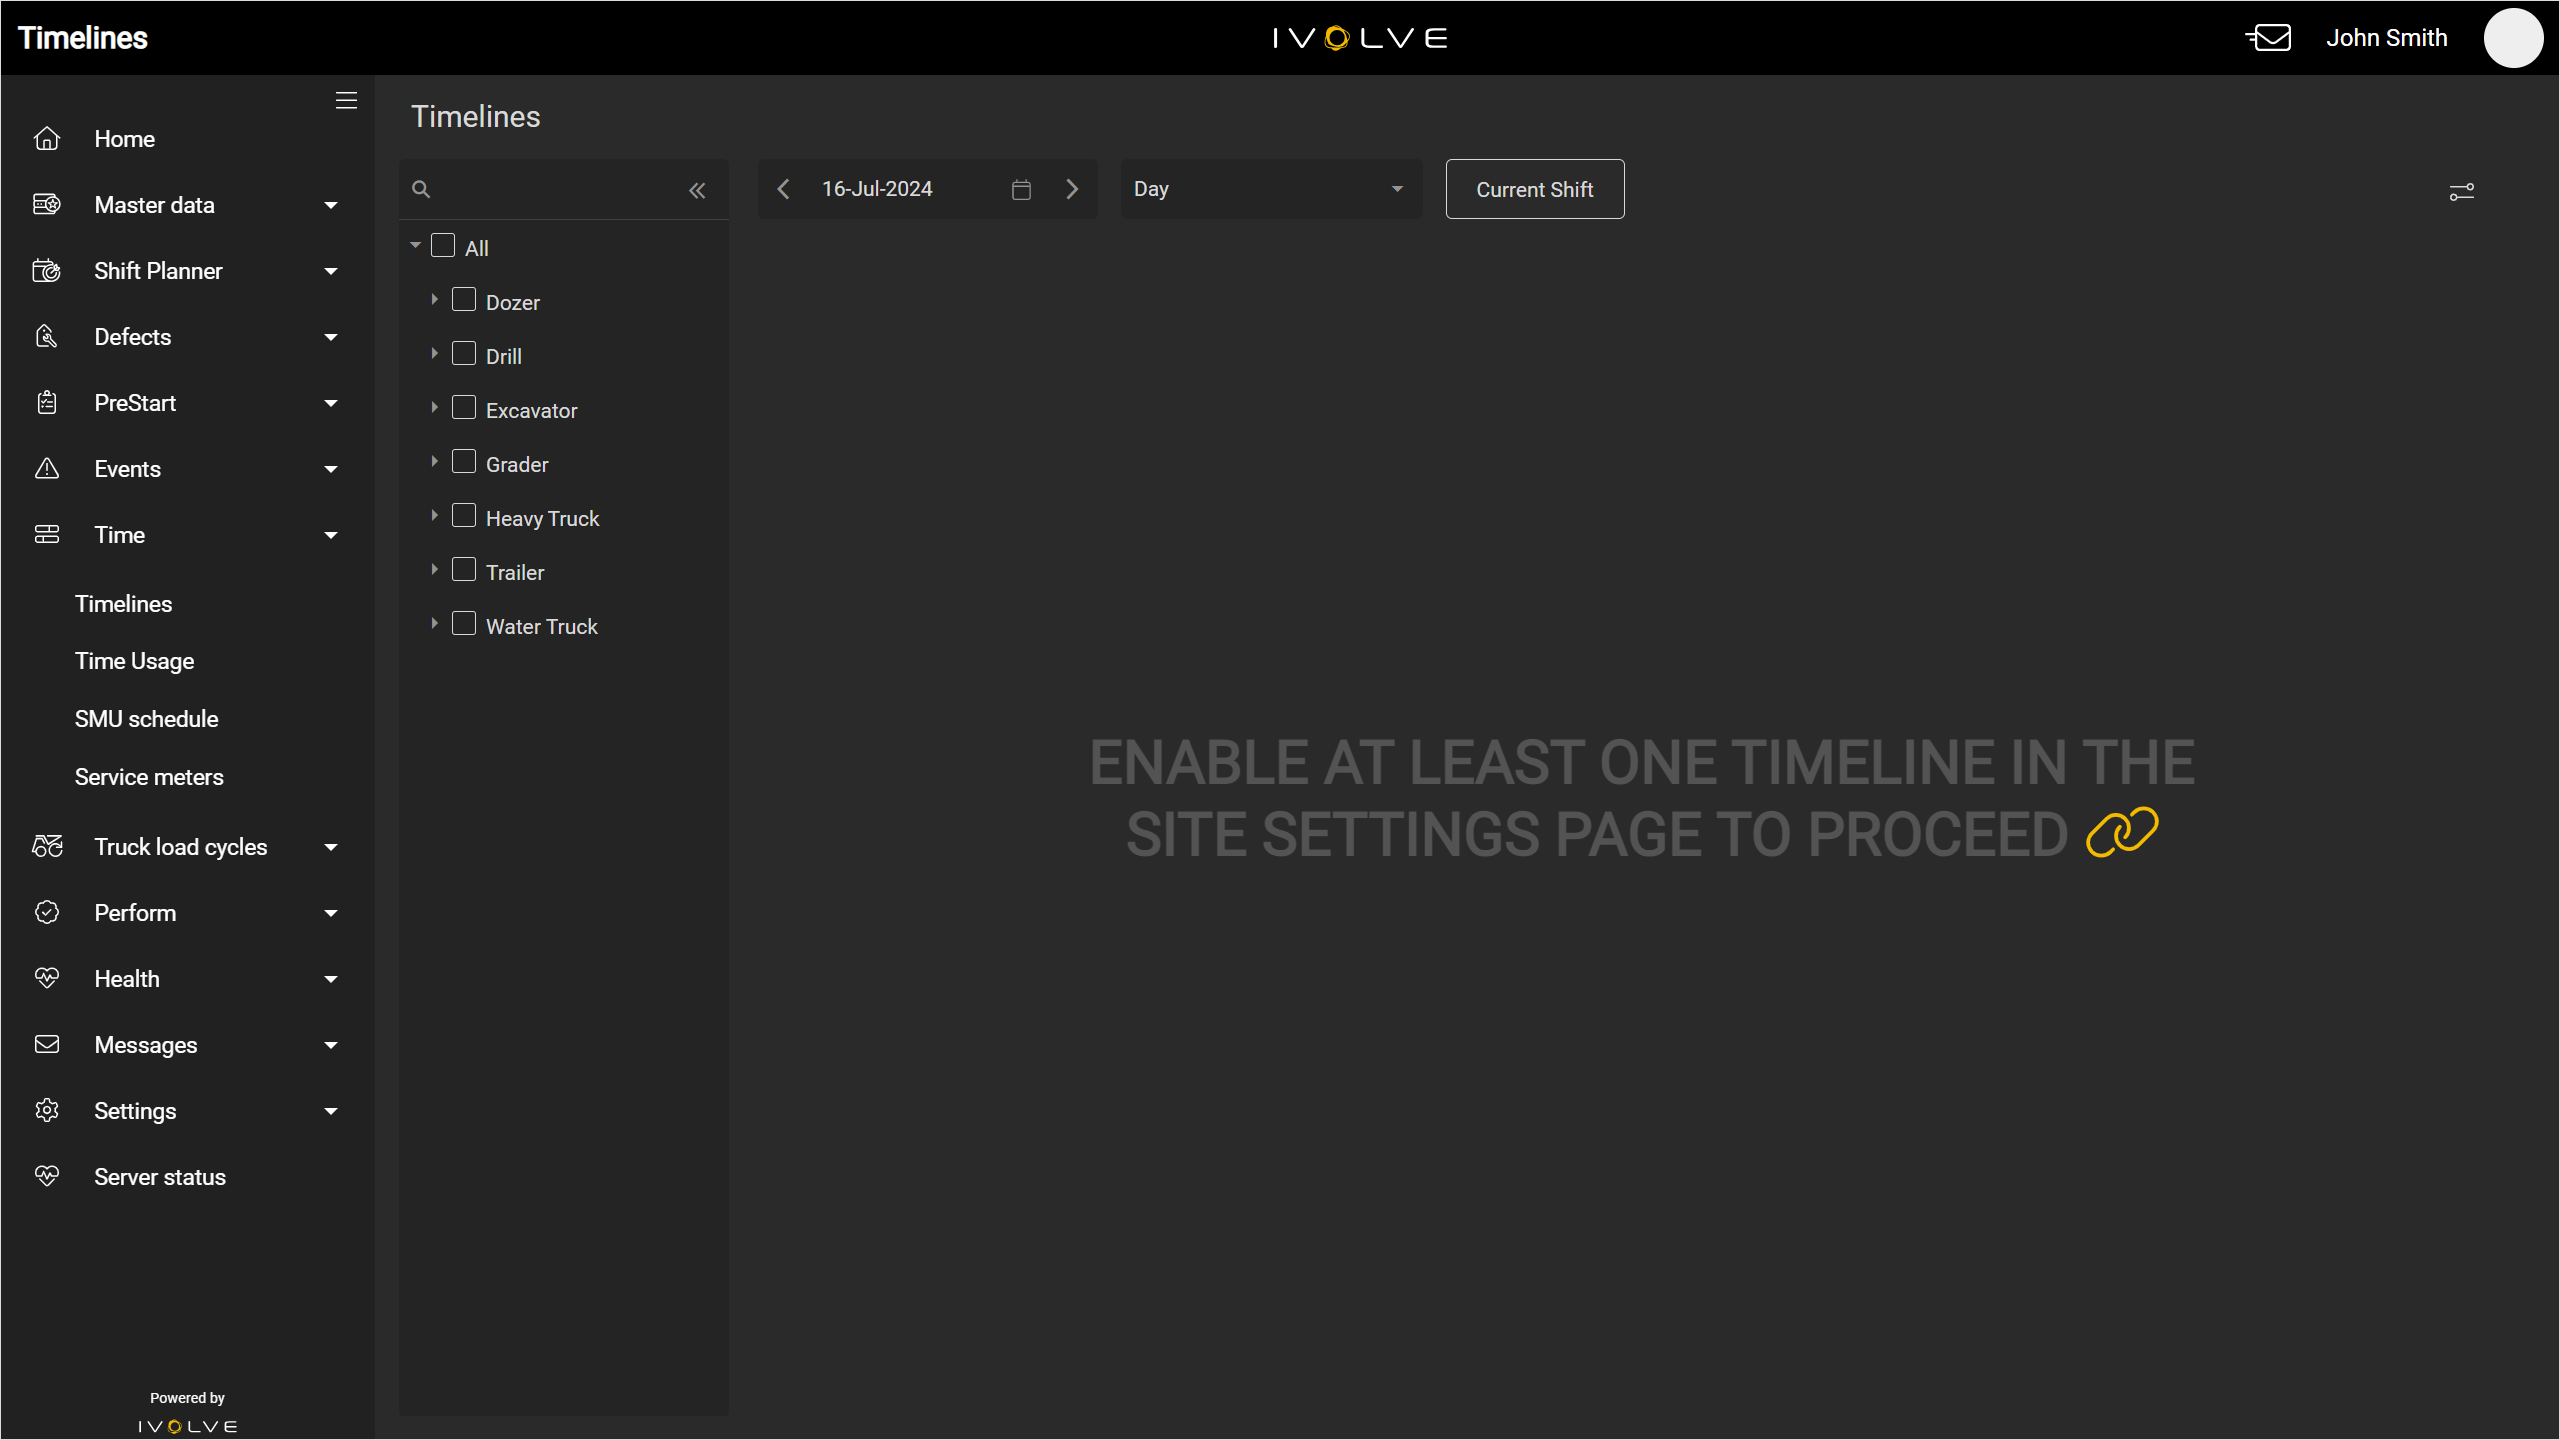
If you clear every Enable timeline check box, no entries will display on the timeline. Instead, each user's timeline will display a prompt to add at least one row. Open the Site settings page and select at least one Enable timeline check box.
Any users without the appropriate level of access will not be able to open the link displayed in the prompt. In this case, contact your site administrator to edit the Site settings page and select at least one Enable timeline check box.