A Perform Gear selection event occurs when operators use a gear that is not allowed in the geofence area they occupy. The rules that define this event are set and managed by the Master Data Editor in GoLine.
You can also set up a Gear selection event in iControl. See the Setting up a Perform Gear selection event in iControl topic for this process.
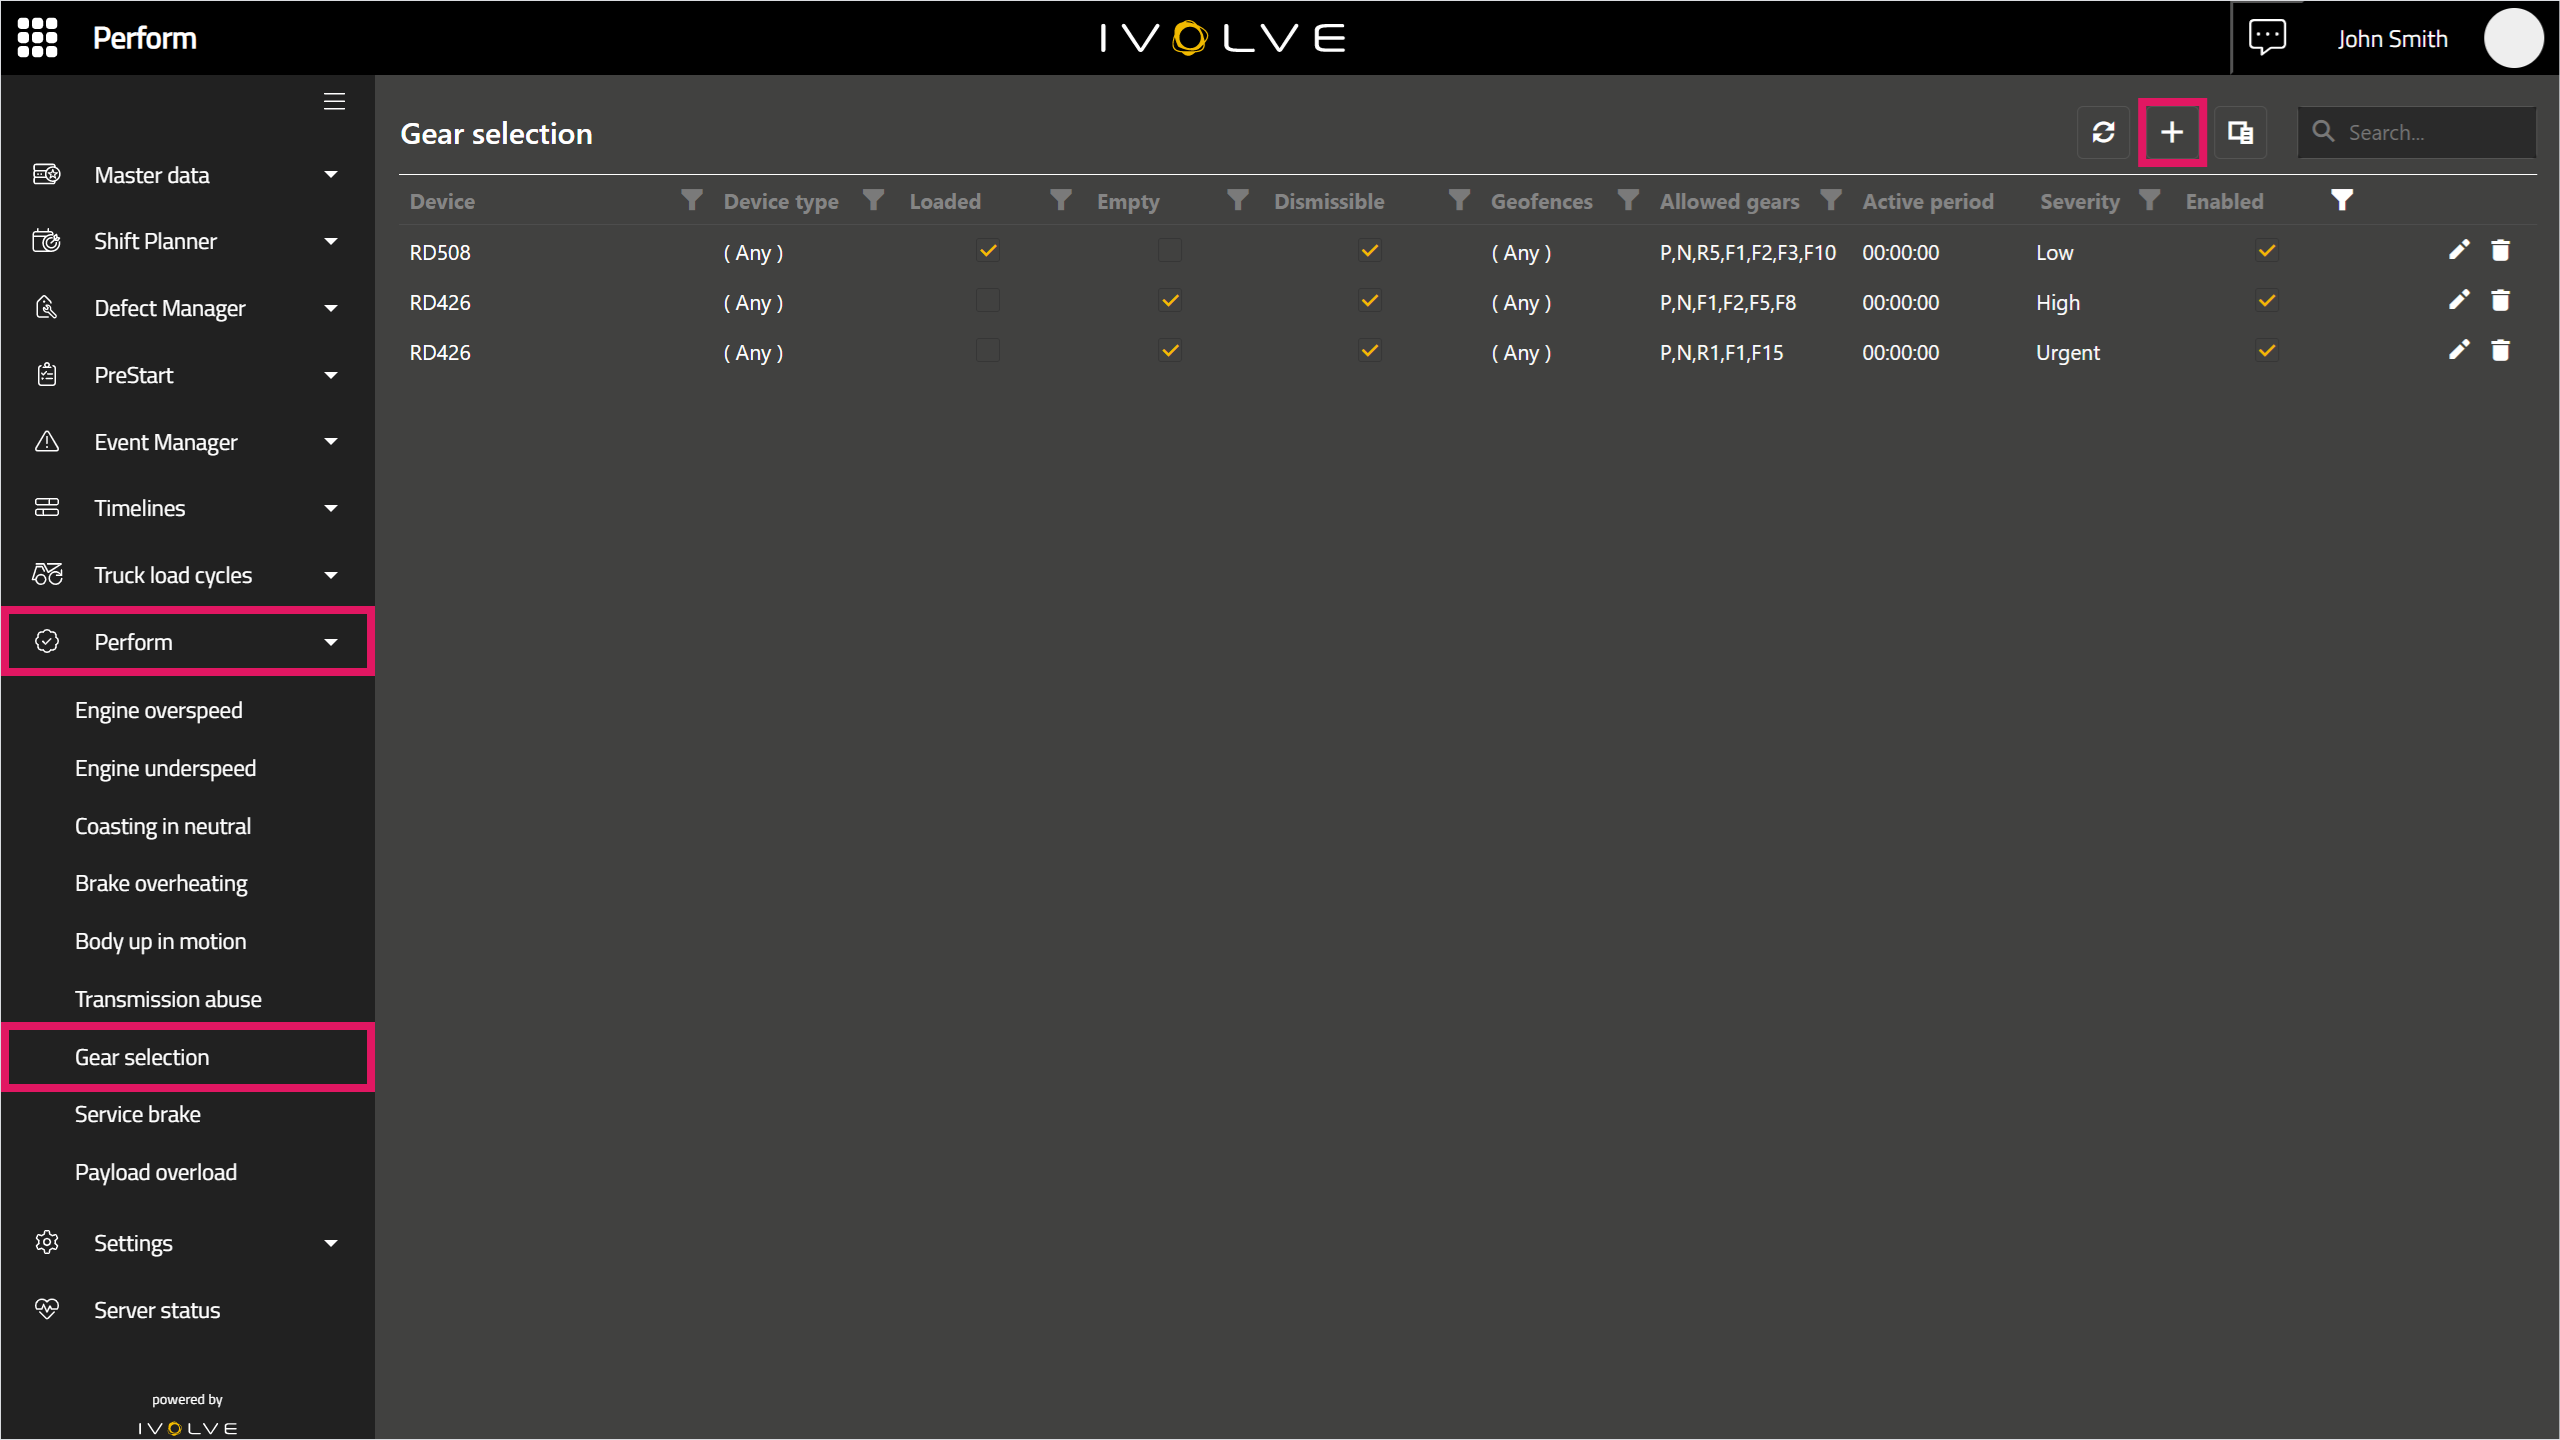
To define a Gear selection event in GoLine:
-
Click Perform in the left-hand menu, then select Gear selection from the list and click the Add icon in the top-right corner of the screen.
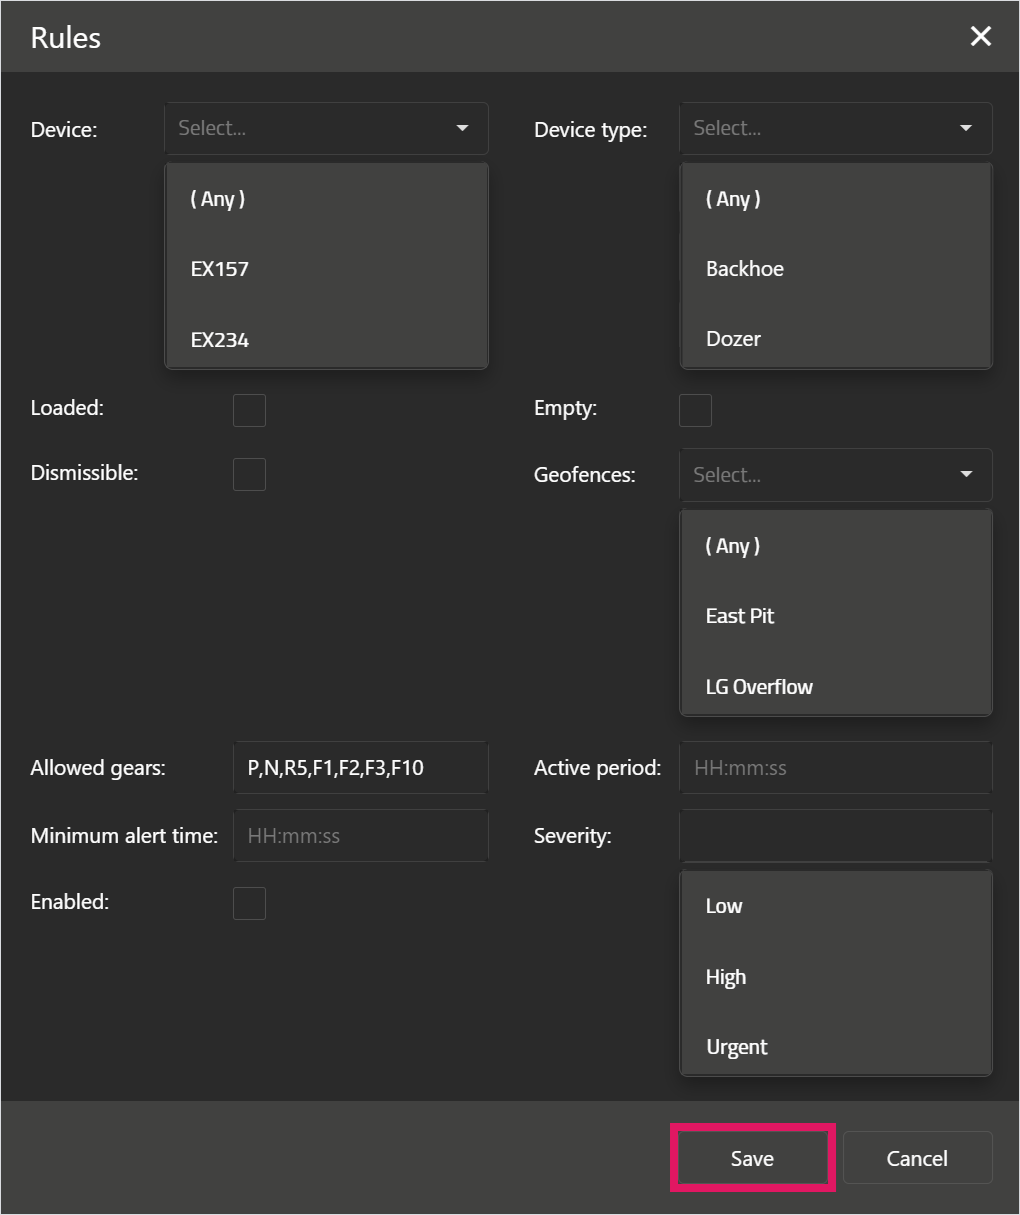
The Rules window opens; enter information and select options in its fields as needed.
-
In the Device field, select a device for the Gear selection event, or select Any to apply the event to all devices.
-
In the Device type field, select a device type for the Gear selection event, or select Any to apply the event to all device types.
-
Select the Loaded check box to only apply the rule to loaded haul trucks, or select the Empty check box to only apply the rule to empty haul trucks.
These check boxes only apply to haul trucks. Any other machine type will ignore these options.
-
In the Geofence field, select a geofence for the Gear selection event, or select Any to apply the event to all geofences.
-
In the Allowed gears column, enter the gears the machine can use, separated by a comma with no spaces.
For example, if a machine is allowed to use Park, Neutral, Forward 1 and Reverse 1, enter "P,N,F1,R1".
-
In the Active period column, enter how long the operator must have the wrong gear selected to start the event. If you enter a value of "0" or leave this field empty, the event starts as soon as the operator selects the wrong gear.
-
In the Minimum alert time column, enter how long the iVolve screen displays the alert.
-
Select the Dismissable check box to allow the operator to dismiss the alert; if this check box is clear, the alert cannot be dismissed and will display until the operator selects the correct gear.
-
In the Severity column, select Low, High, or Urgent from the drop-down menu to set the event's severity.
-
Select the Enabled check box to implement the rule; if this check box is clear, Perform will not monitor this event.
-
Click Save.
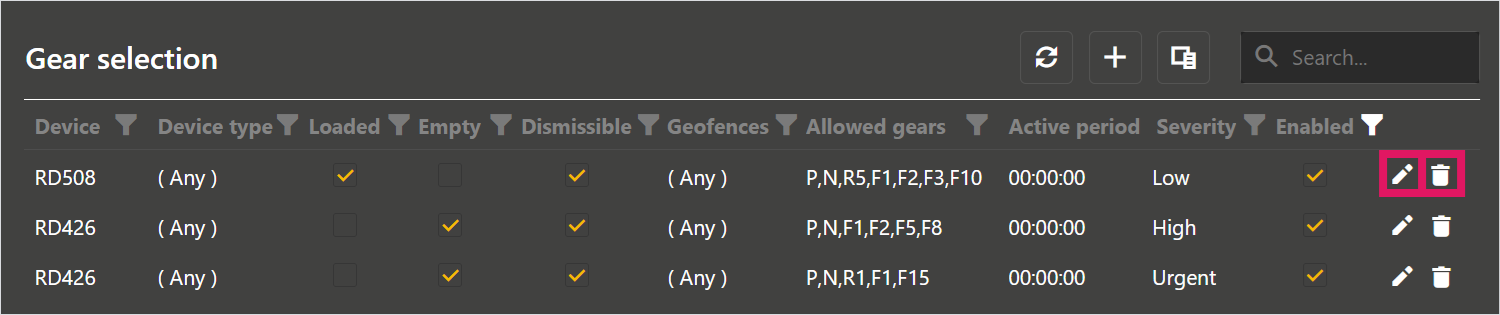
Editing and Deleting Rules
To edit a rule, click the Edit icon on the right-hand side of the rule, make changes as needed in the Rules window that opens, then click Save.
To delete a rule, click the Delete icon on the right-hand side of the rule, then click Yes in the confirmation window that opens.
An existing rule cannot be completely deleted, as other entities might reference the rule. Instead, clicking the Delete icon disables the rule. This has the same effect as editing a rule and clearing its Enabled check box.