On this Page:On this Page:
Message templates define the overall presentation of a message to an operator, as well as the message itself. You can configure a message's colour, expiration date, severity, and more when creating a message template.
The templates you create can also be edited by the sender to customise the message before they are sent, however you can lock certain aspects of a template to ensure they cannot be changed by the sender.
Locking a field in a template can affect whether it is displayed to the sender when they send a message. When most Message template fields are locked they are not shown when the message is sent, with the exception of the Title and Text fields, which are always displayed, but cannot be edited if they are locked.
Creating Message templates
To create a message template:
-
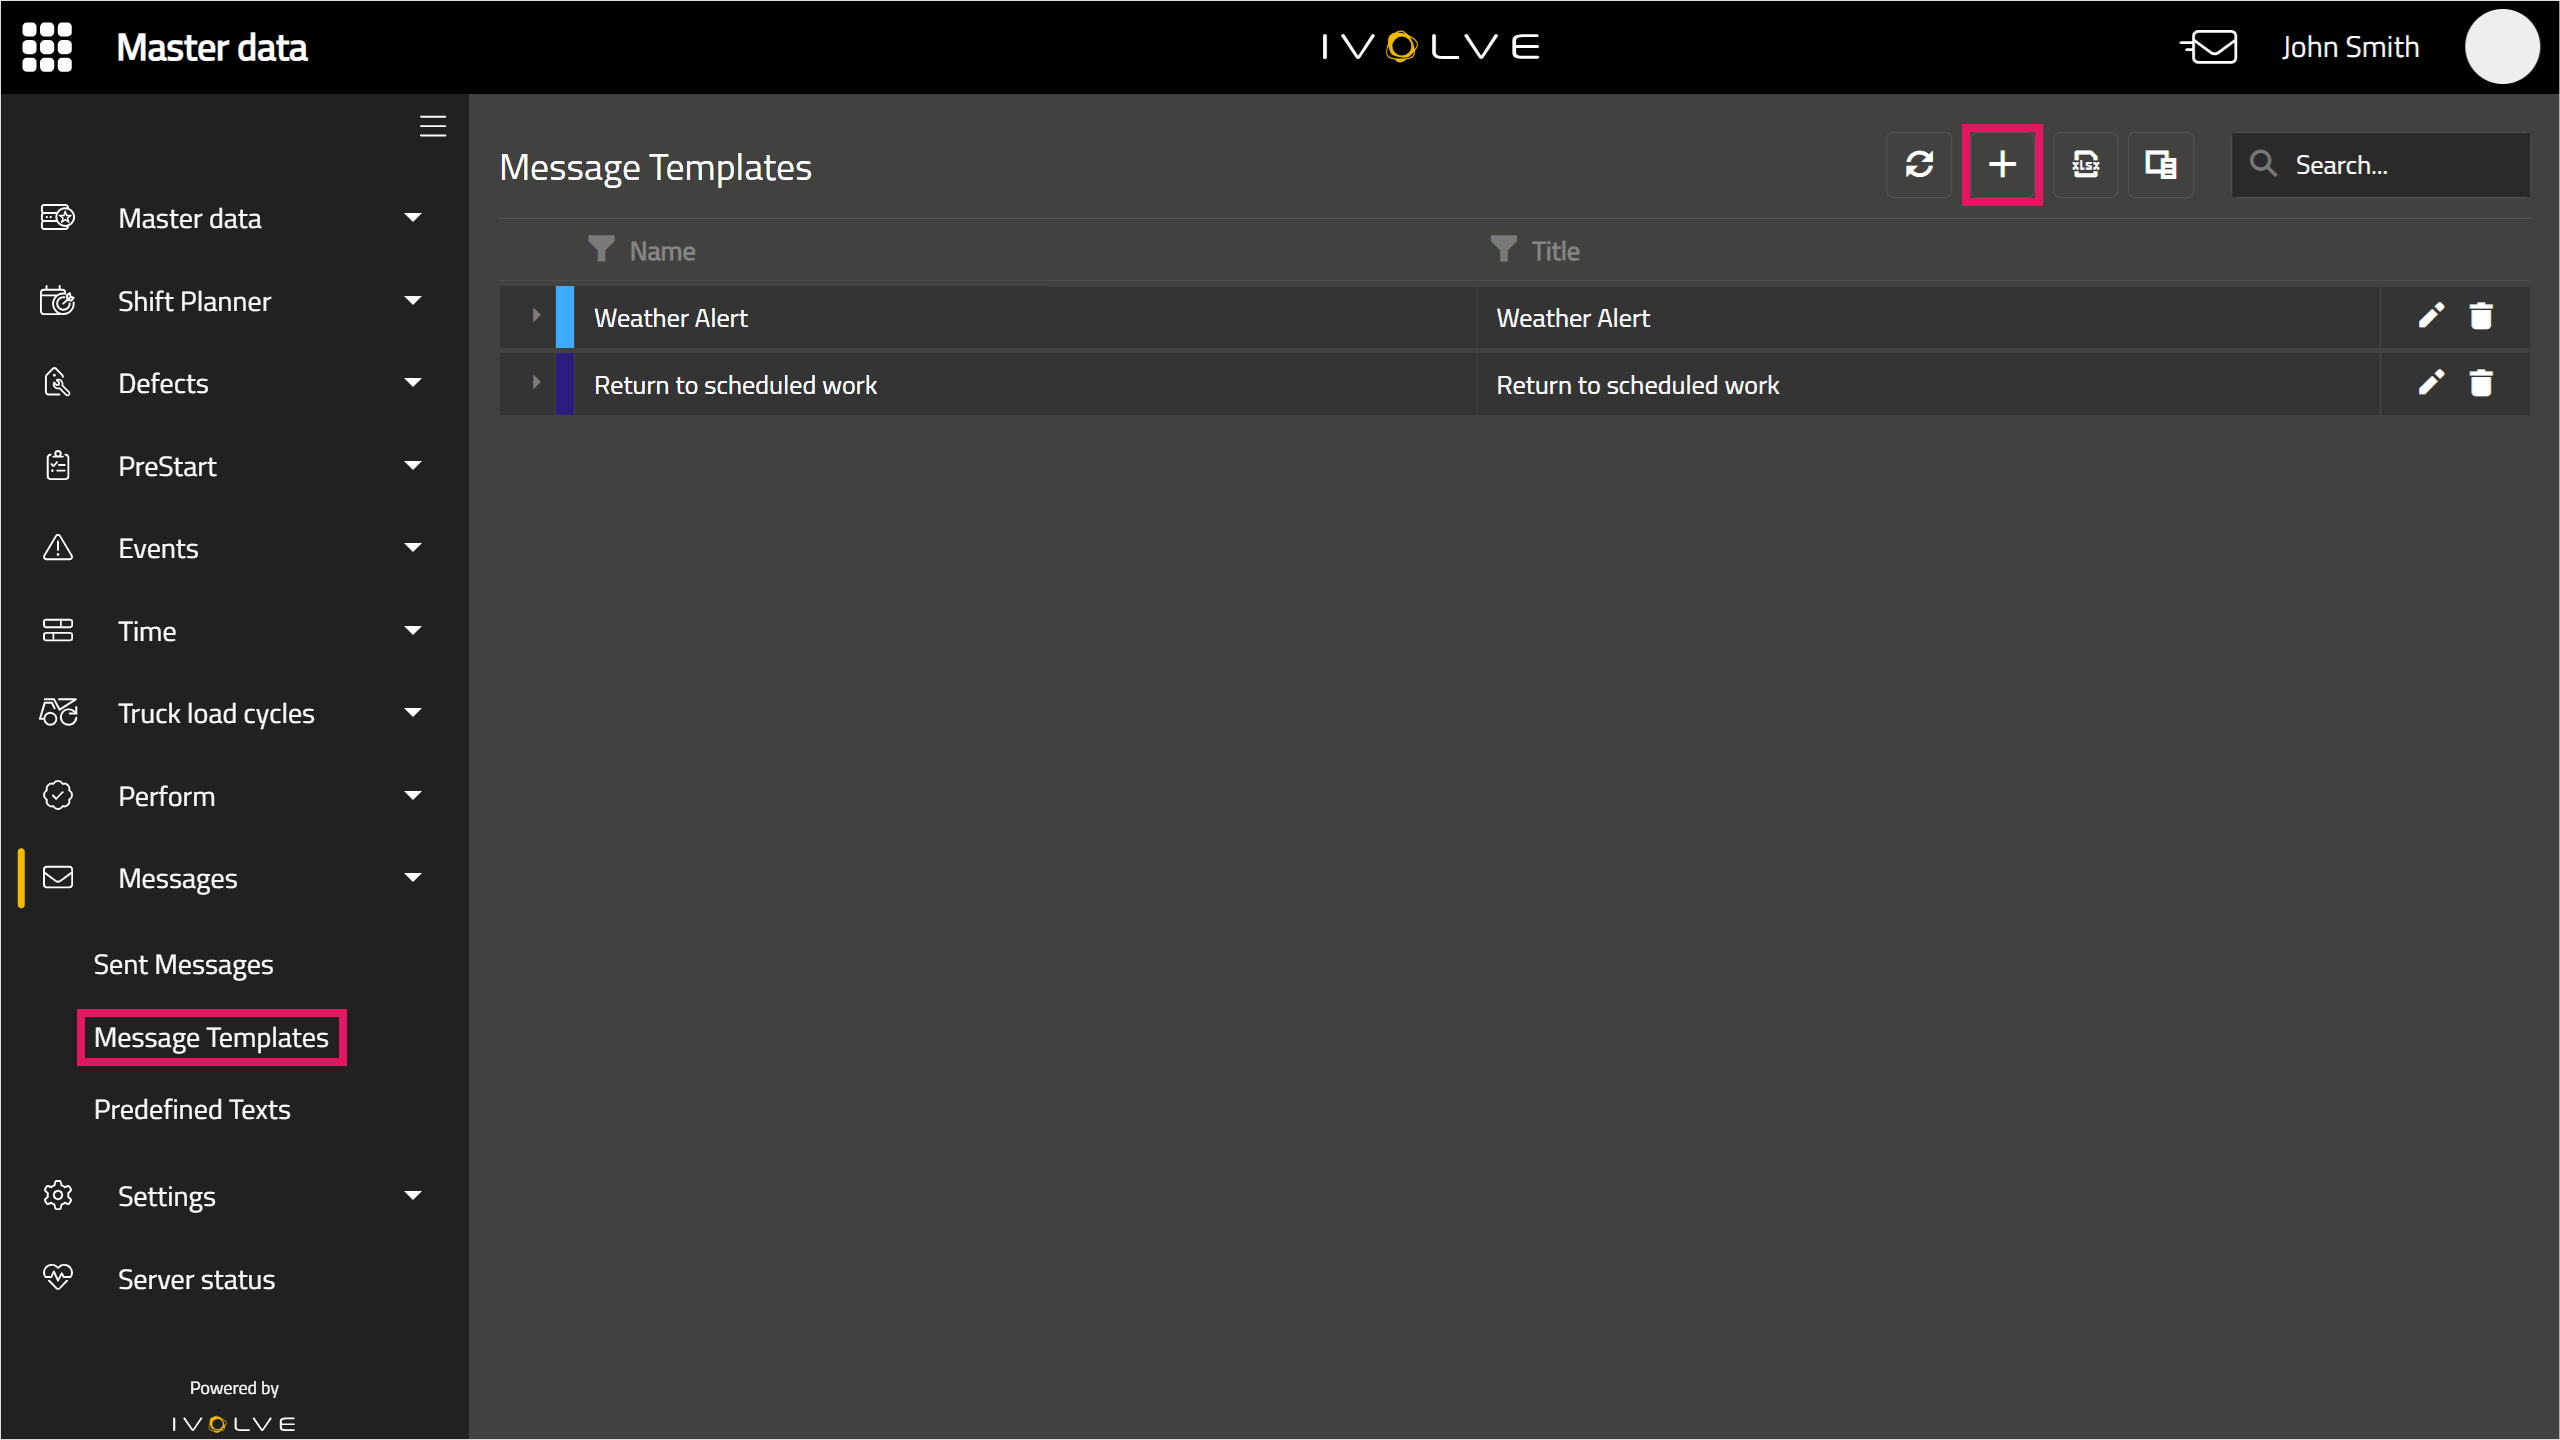
In GoLine, in the Messages section, select Message Templates, then click Add in the top-right corner.
-
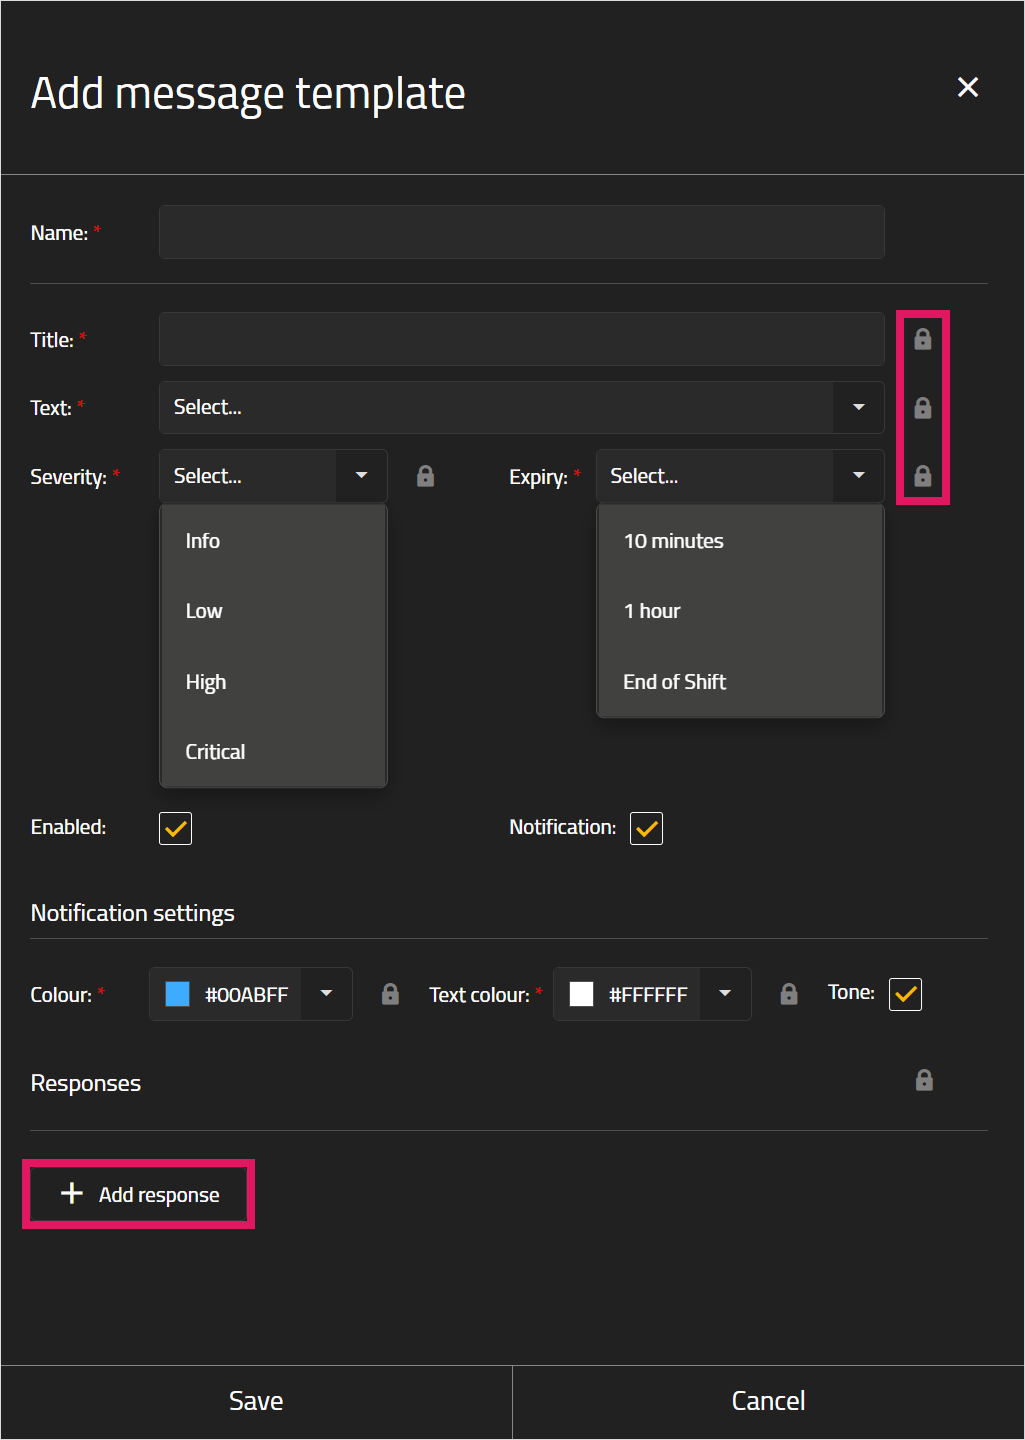
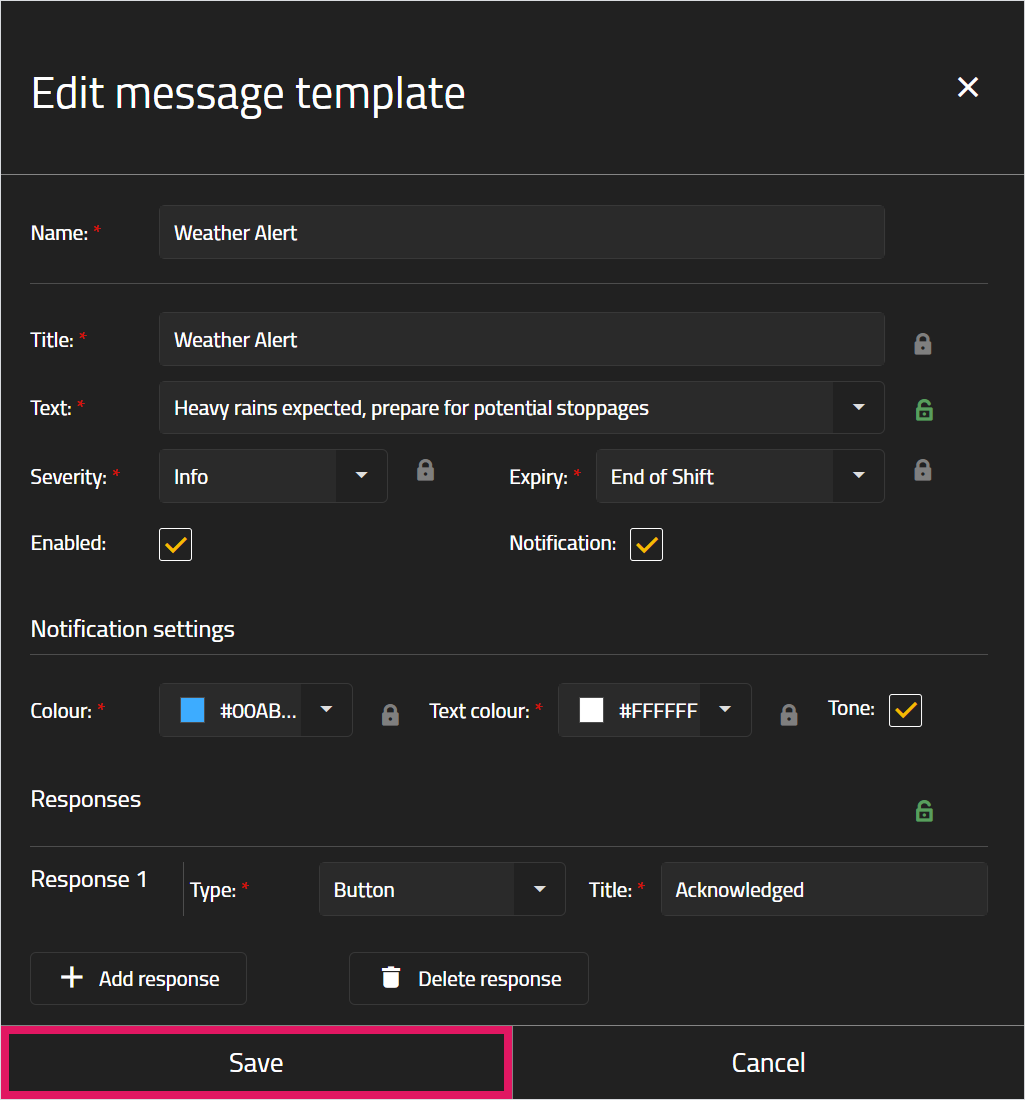
Enter a Name for the message template. This name will not be shown to the message's recipient, and can be anything that identifies the message template.
-
Ensure the Enabled check box is selected.
If the Enabled check box is cleared, the message template cannot be used in any messages.
-
Enter a Title for the message template; this title will be shown to the message's recipient, and should be relevant to the contents of the message.
You can lock the Title by clicking the Lock icon next to the field. If this icon is locked, the Title of this template cannot be edited when it is sent as a message. This applies to any field where the Lock icon appears.
-
Select a message from the drop-down list in the Text field, or write your own message in this field as needed.
The options available in this field are created in the Predefined texts page. See the Creating and managing predefined texts in GoLine topic for more information.
-
Select a Colour and Text colour for the message; these colours can be entered as an RGB value or Hex code, or chosen from a colour spectrum.
-
Select a Severity and Expiry for the message.
-
Select the Notification check box to display a notification on the operator's in-cab when they receive the message.
-
Select the Tone check box to play a tone on the operator's in-cab iVolve display when they receive the message.
-
If this message template does not require a response, click Save.
If this message template does require a response, click Add Response, then follow the additional steps below.


If you click Add Response, you will also need to configure at least one response in the Responses section. You can configure a maximum of three responses.
-
In the Type field, select from Button, Predefined, or Predefined + Free text.
-
If Button is selected, the recipient will see a button to acknowledge the message. Write a response in the Title field (this is the text that will appear on the button) and press "Enter" on your keyboard; you must press "Enter" on your keyboard or the message will not be saved.
-
If Predefined is selected, the recipient will see up to five short messages they can select to respond to the message.
The recipient can only select one of the five responses; they cannot select multiple responses.
Enter a Title to describe the responses, then write the responses in the Responses field (this is the text the recipient can select) and press "Enter" on your keyboard; you must press "Enter" on your keyboard or the message will not be saved.
-
If Predefined + Free text is selected, the recipient will see a short message they can select to acknowledge the message, and will also have the option to write their own response. Write a response in the Title field (this is the text that will appear in the response) and press "Enter" on your keyboard; you must press "Enter" on your keyboard or the message will not be saved.
-
Click the Add response button to add more responses (up to a maximum of three responses), or click Delete response to delete the most recently added response.
The Delete response button will always delete the most recently added response. For example, if you have three responses, you cannot delete Response 2 and leave Responses 1 and 3 remaining; in this scenario, you can only delete Response 3.
If a response is deleted, this cannot be undone. You will need to re-enter a response's details if it is deleted in error.
-
Click Save.

Editing Message templates
To edit an existing message template:
-
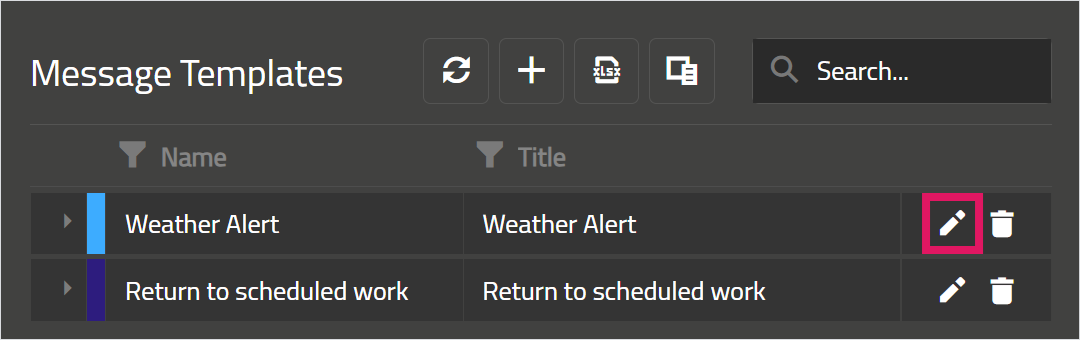
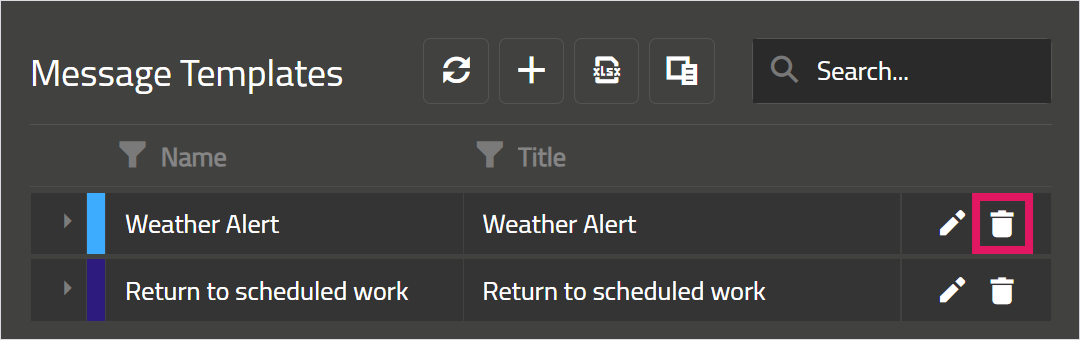
Click the Edit icon on a message template.
-
Make changes as needed, then click Save.
If the message template has previously been deleted, selecting its Enabled check box will re-enable the message template. See the Deleting message templates section of this topic below for more information.


Deleting message templates
When you delete a message template it can no longer be sent to an operator.
However, this is a soft delete, and the message template can be enabled again by selecting its Enabled check box. See the Editing message templates section of this topic above for more information on this process.
To delete a message template:


-
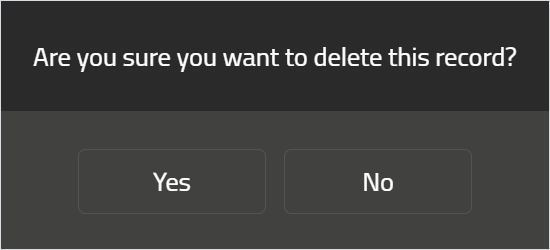
Click the Delete icon on a message template.
-
Click Yes in the confirmation window that opens.
Message templates define the overall presentation of a message to an operator, as well as the message itself. You can configure a message's colour, expiration date, severity, and more when creating a message template.
The templates you create can also be edited by the sender to customise the message before they are sent, however you can lock certain aspects of a template to ensure they cannot be changed by the sender.
Locking a field in a template can affect whether it is displayed to the sender when they send a message. When most Message template fields are locked they are not shown when the message is sent, with the exception of the Title and Text fields, which are always displayed, but cannot be edited if they are locked.
Creating Message templates
To create a message template:
-
In GoLine, in the Messages section, select Message Templates, then click Add in the top-right corner.
-
Enter a Name for the message template. This name will not be shown to the message's recipient, and can be anything that identifies the message template.
-
Ensure the Enabled check box is selected.
If the Enabled check box is cleared, the message template cannot be used in any messages.
-
Enter a Title for the message template; this title will be shown to the message's recipient, and should be relevant to the contents of the message.
You can lock the Title by clicking the Lock icon next to the field. If this icon is locked, the Title of this template cannot be edited when it is sent as a message. This applies to any field where the Lock icon appears.
-
Select a message from the drop-down list in the Text field, or write your own message in this field as needed.
The options available in this field are created in the Predefined texts page.
-
Select a Colour and Text colour for the message; these colours can be entered as an RGB value or Hex code, or chosen from a colour spectrum.
-
Select a Severity and Expiry for the message.
-
Select the Notification check box to display a notification on the operator's in-cab when they receive the message.
-
Select the Tone check box to play a tone on the operator's in-cab iVolve display when they receive the message.
-
If this message template does not require a response, click Save.
If this message template does require a response, click Add Response, then follow the additional steps below.
If you click Add Response, you will also need to configure at least one response in the Responses section. You can configure a maximum of three responses.
-
In the Type field, select from Button, Predefined, or Predefined + Free text.
-
If Button is selected, the recipient will see a button to acknowledge the message. Write a response in the Title field (this is the text that will appear on the button) and press "Enter" on your keyboard; you must press "Enter" on your keyboard or the message will not be saved.
-
If Predefined is selected, the recipient will see up to five short messages they can select to respond to the message.
The recipient can only select one of the five responses; they cannot select multiple responses.
Enter a Title to describe the responses, then write the responses in the Responses field (this is the text the recipient can select) and press "Enter" on your keyboard; you must press "Enter" on your keyboard or the message will not be saved.
-
If Predefined + Free text is selected, the recipient will see a short message they can select to acknowledge the message, and will also have the option to write their own response. Write a response in the Title field (this is the text that will appear in the response) and press "Enter" on your keyboard; you must press "Enter" on your keyboard or the message will not be saved.
-
Click the Add response button to add more responses (up to a maximum of three responses), or click Delete response to delete the most recently added response.
The Delete response button will always delete the most recently added response. For example, if you have three responses, you cannot delete Response 2 and leave Responses 1 and 3 remaining; in this scenario, you can only delete Response 3.
If a response is deleted, this cannot be undone. You will need to re-enter a response's details if it is deleted in error.
-
Click Save.
Editing Message templates
To edit an existing message template:
-
Click the Edit icon on a message template.
-
Make changes as needed, then click Save.
If the message template has previously been deleted, selecting its Enabled check box will re-enable the message template. See the Deleting message templates section of this topic below for more information.
Deleting message templates
When you delete a message template it can no longer be sent to an operator.
However, this is a soft delete, and the message template can be enabled again by selecting its Enabled check box. See the Editing message templates section of this topic above for more information on this process.
To delete a message template:
-
Click the Delete icon on a message template.
-
Click Yes in the confirmation window that opens.