
3D office needs to have permissions to modify system files.
Simply run 3D-Office as admin (right click the icon > Run as administrator) then proceed to create your custom projection/datum as required.
Projection
Projection
-
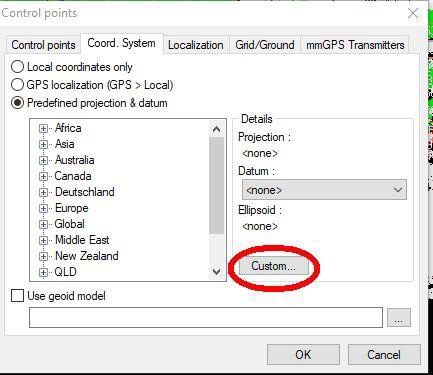
Go to Project > Control Points > Coord System
-
Select Custom
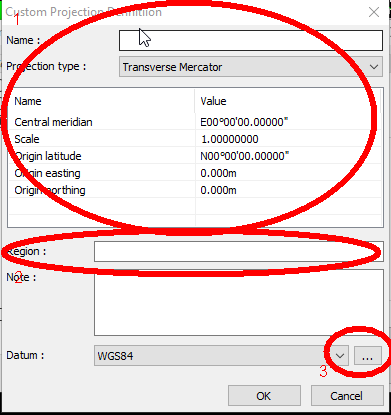
Enter a name and the required values for your Projection.
-
Enter the Region (Tip: you will find the custom projection listed under this region in Pocket 3D/3DMC).
-
Then hit the button next to your datum selection.
Datum
-
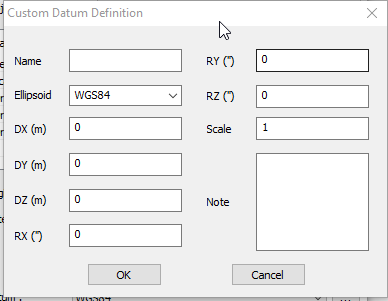
Enter your datum parameters.
Ellipsoid
-
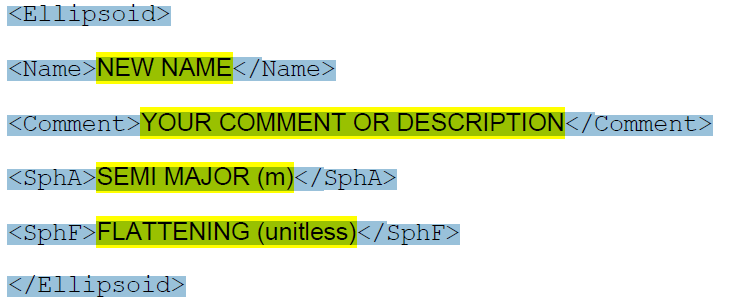
If you wish to customize your ellipsoid, then unfortunately you cannot do this through 3D Office. You need to manually go to C:\Program Files (x86)\Topcon\3D-Office\CoordSys, then edit ellipsoids.xml
-
Right-click and hit edit (or open in notepad)
-
Add in the following entry under data.
It may not allow you to hit ‘save’ to update the file. In this case, save the file to your desktop (without changing the filename), then copy paste back to the original directory and accept the windows permissions prompts which appear.
Transfer to machine/field controller
-
Go to C:\Program Files (x86)\Topcon\3D-Office\CoordSys. to acquire userdatums.xml, userprojections.xml and ellipsoids.xml
-
Copy userdatums.xml to C:\Program Files (x86)\Topcon\Pocket-3D\CoordSys\Datums
-
Copy userprojections.xml to C:\Program Files (x86)\Topcon\Pocket-3D\CoordSys\Projections
-
Copy ellipsoids.xml to C:\Program Files (x86)\Topcon\Pocket-3D\CoordSys
Note: replace Pocket-3D with 3DMC in the above directories for 3DMC.