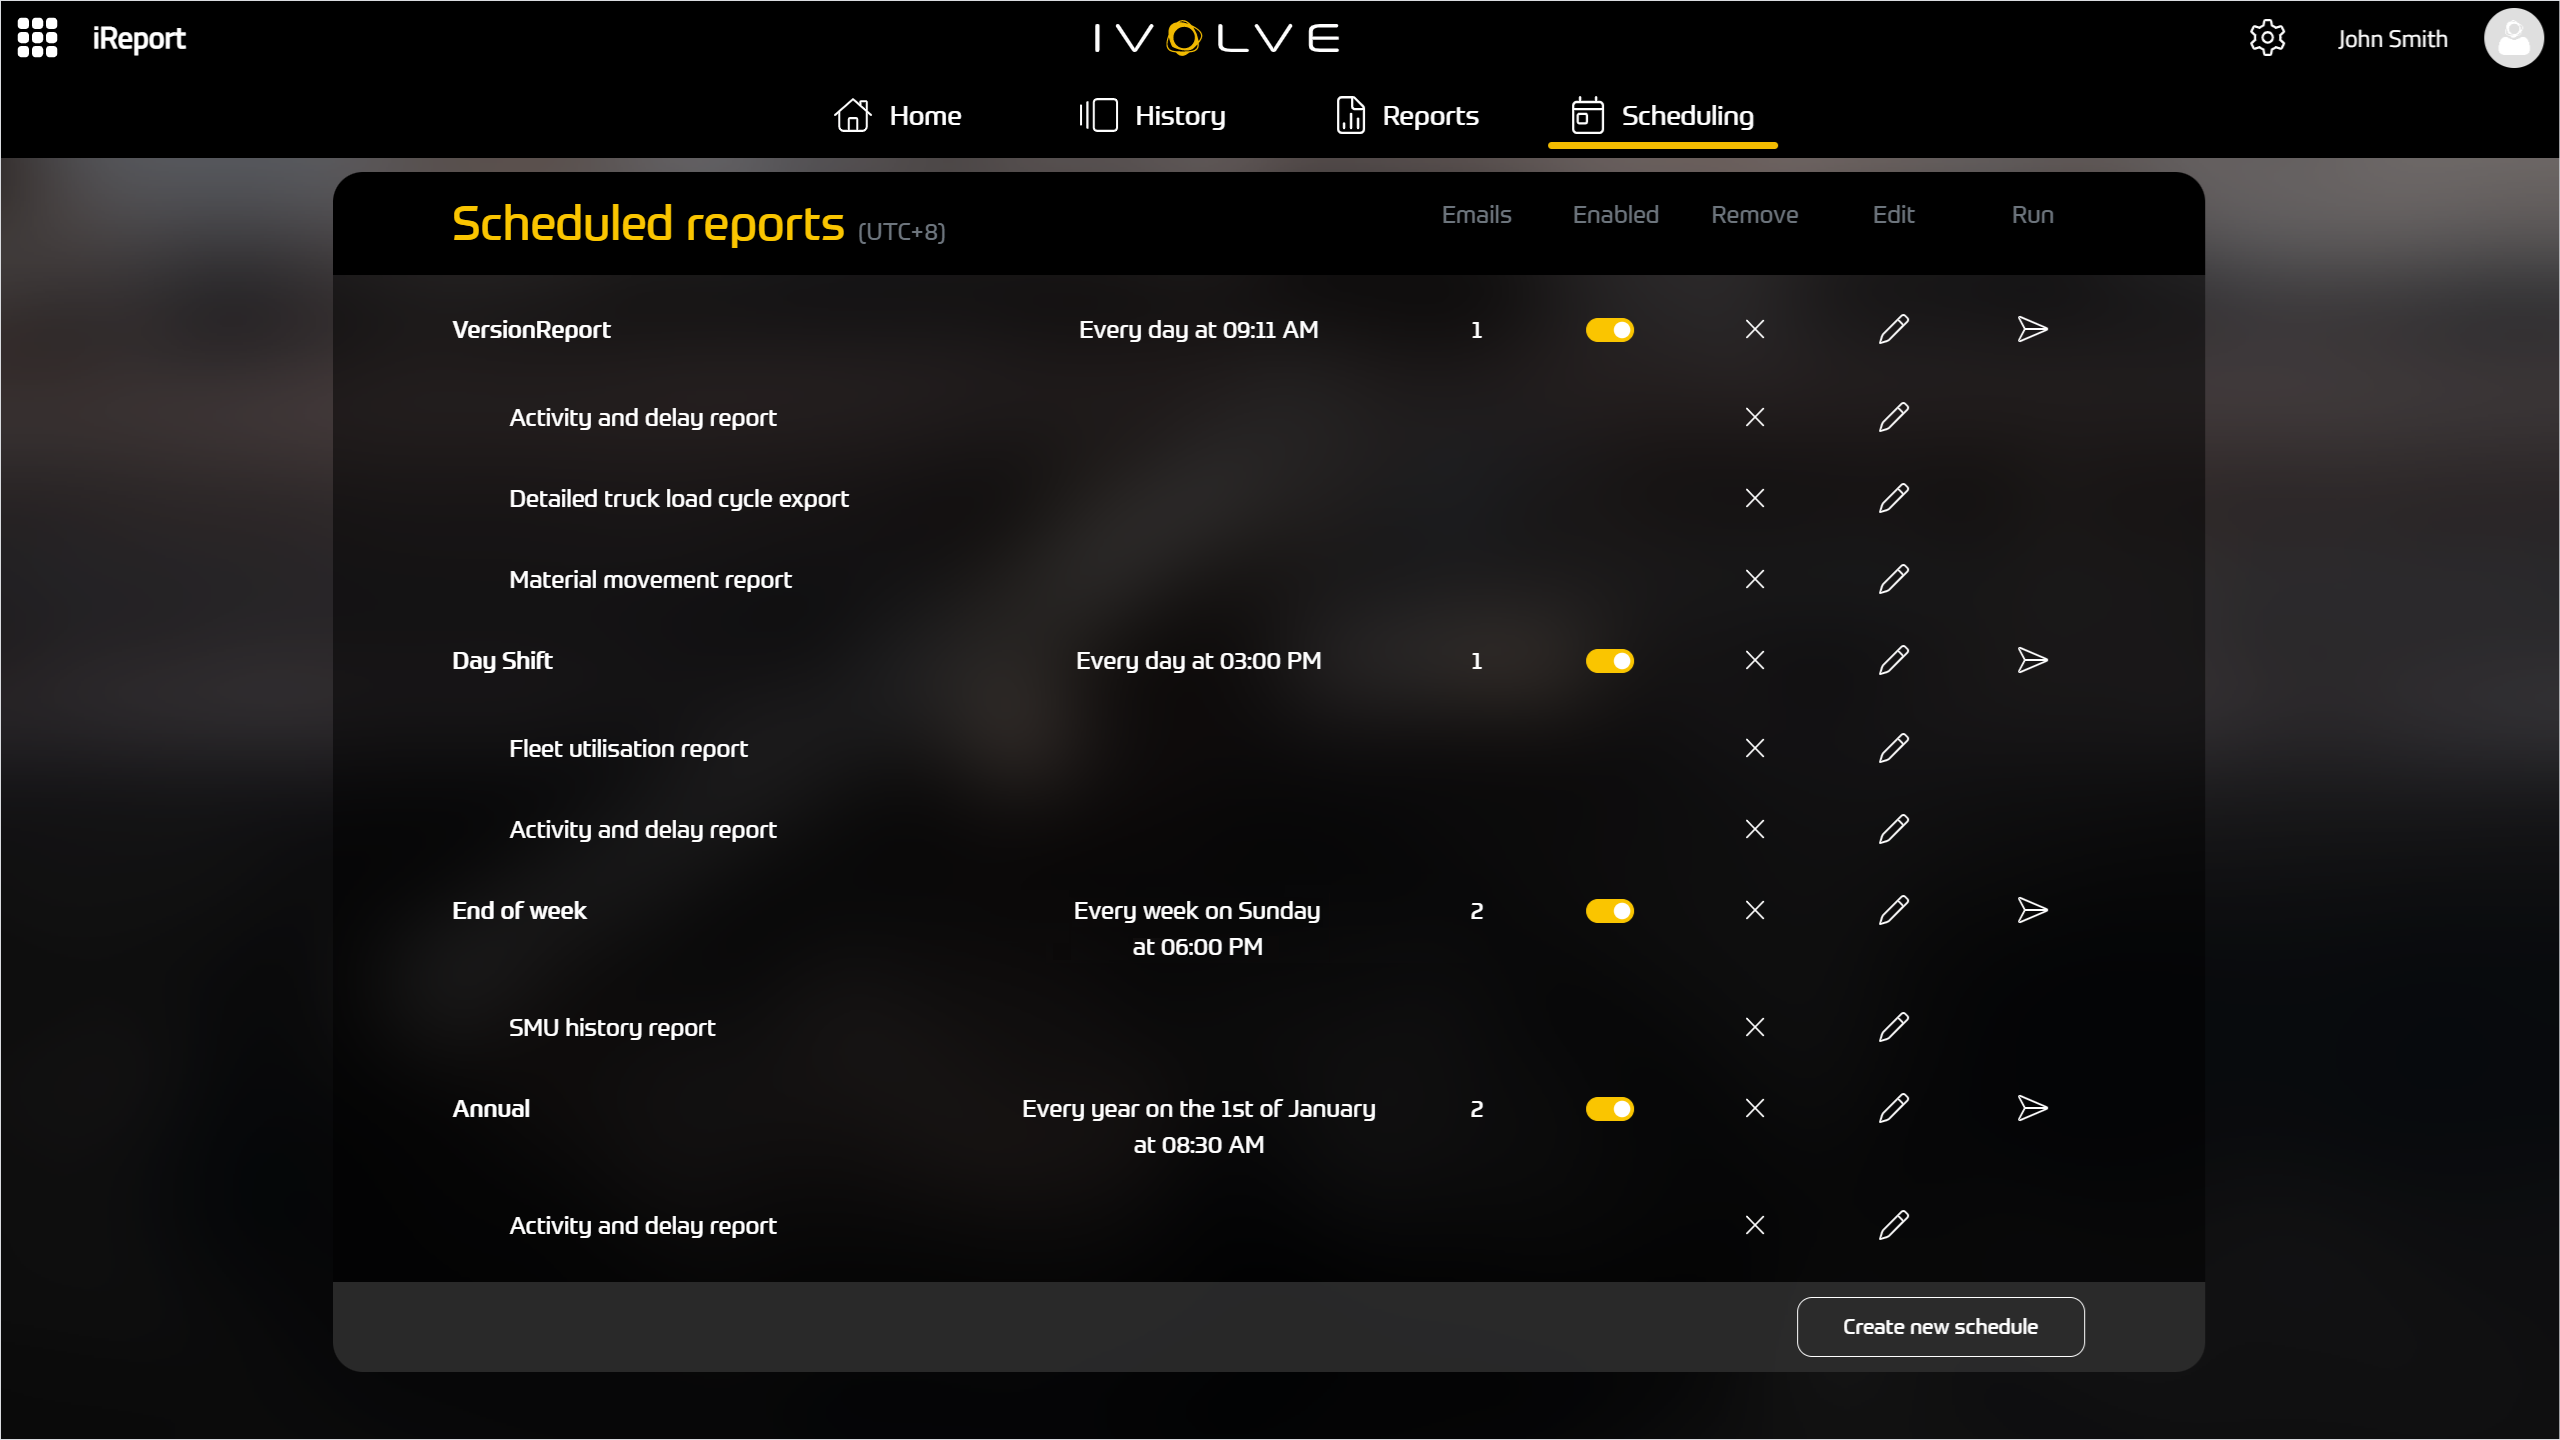
You can create schedules to automatically generate and send one or more reports via email to one or more contacts.
There is no limit to how many reports you can add to a schedule, however adding too many reports might cause the email to exceed its size limit and not be sent.
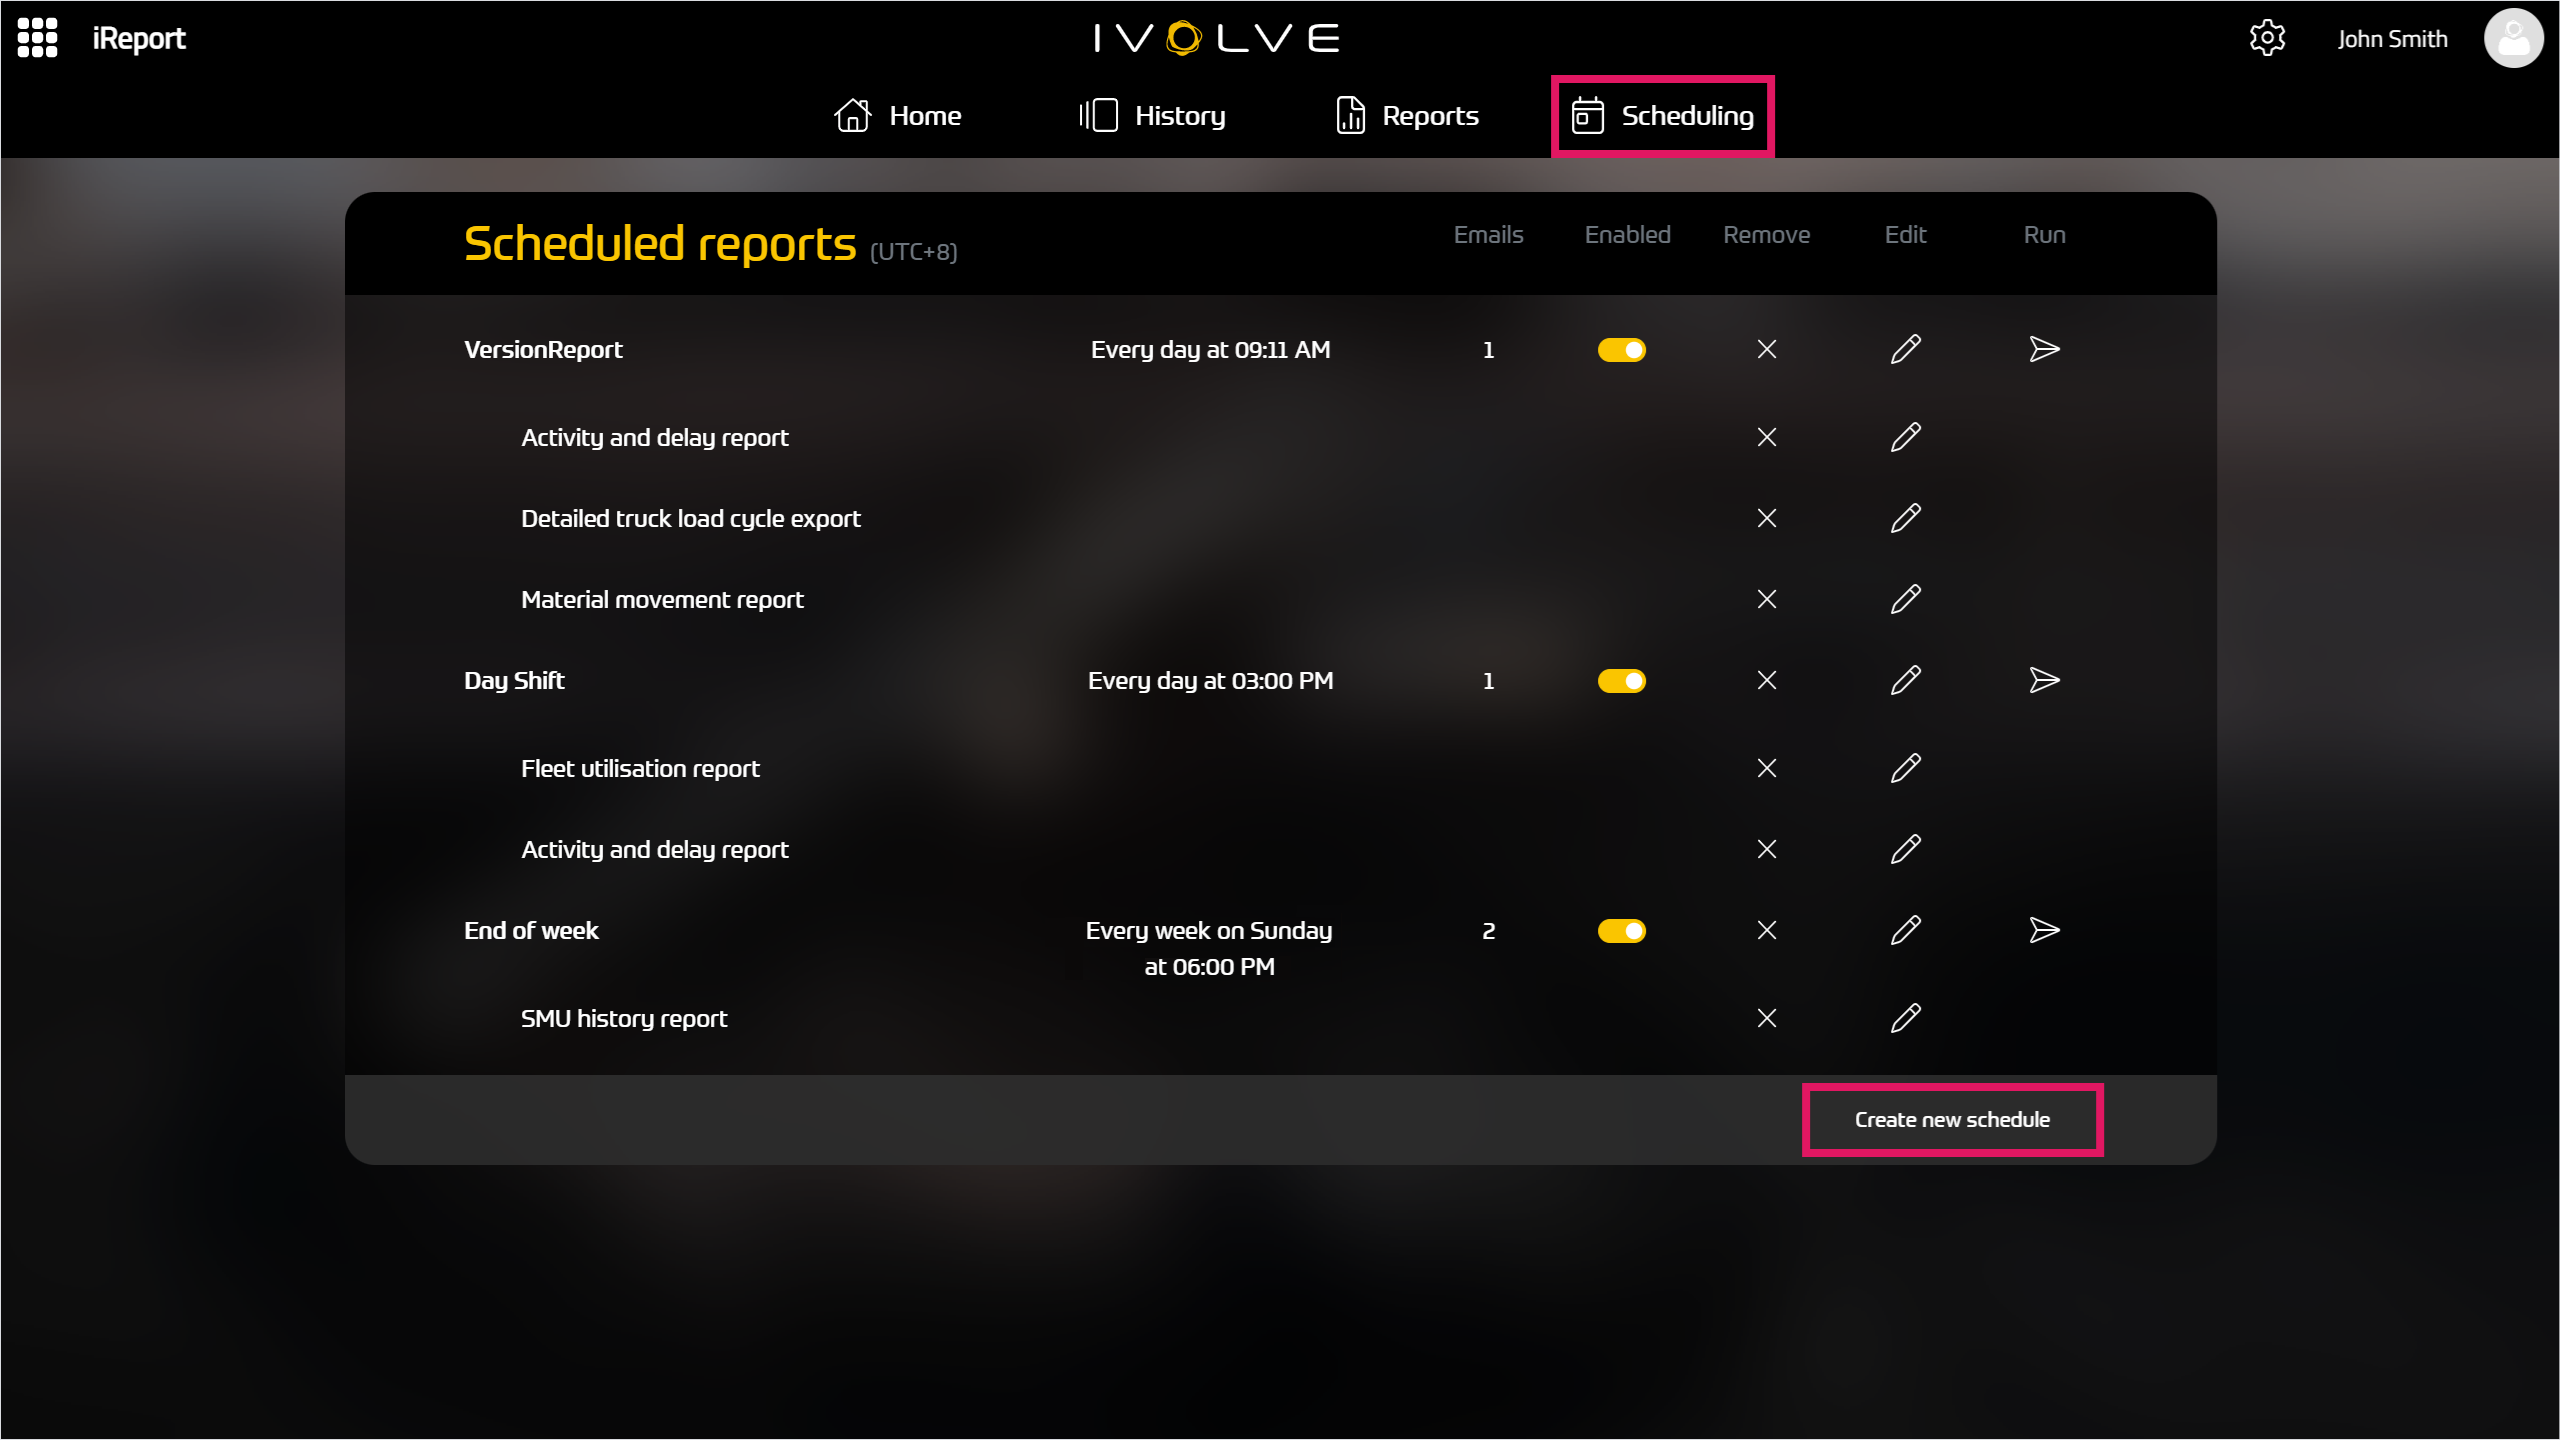
To create a new report schedule, complete the following steps:
-
Select the Scheduling tab.
-
Select Create new schedule below the table of schedules.
-
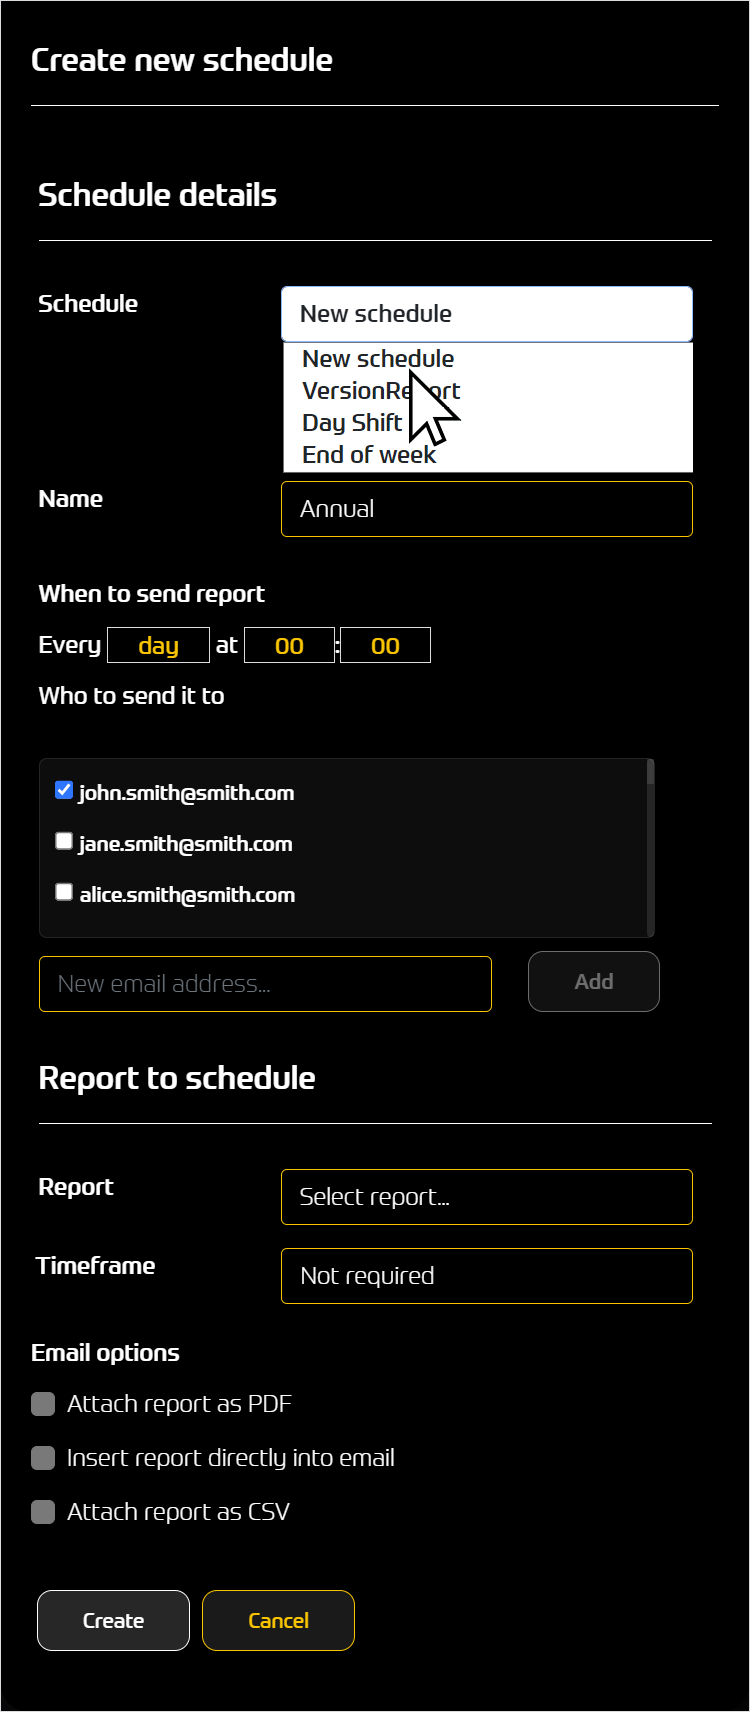
In the Schedule field of the Create new schedule window, select New schedule from the drop-down menu to create a new schedule.
If you select an existing schedule from the drop-down menu, this does not create a new schedule; instead, any changes you make will update the existing schedule. You cannot duplicate an existing schedule, only create a new schedule or update an existing schedule.
See the Assigning multiple report templates to a schedule section below for more information.
-
Enter a unique name for the schedule, specify how often to send the report(s), and select who you want to receive the report(s).
-
To send the scheduled report(s) to a new contact, enter their email address and click Add, then select the check box next to the new contact's name.
-
To send the scheduled report(s) to an existing contact, select the check box next to their name.
-
-
Select the report template you want to run, and set a timeframe for the report as needed.
You must select a report template to create the schedule, however you can only select one report template at this time.
For the process to add additional report templates to the schedule, see the Assigning multiple report templates to a schedule section below.
-
Select the appropriate email options; you can select one or more options from this list.
-
Select any additional parameters for the report template as needed.
-
Click Create.
The iReport Server creates the report schedule, and the Scheduling tab updates to display the additional report schedule.
The new report schedule is enabled by default.